Food for Thought

Five Reasons to Shop Local Small Businesses

December 23, 2014

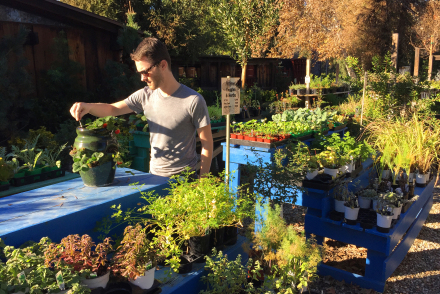
I’ve alway been a huge proponent of local business.  I love feeling of walking into a local, family owned store that specializes in an area of expertise.  There’s a certain artisanal quality of goods offered that you just don’t get with the larger chains.  Its that boutique experience that I greatly appreciate.

Though small vendors can be more expensive than shopping the chains, I feel the pros FAR EXCEED the cons. Staring with the product.

IMG_0969

Better Product: As a chef, I’m mainly looking at the food; and to be a successful chef I like to create unique, fresh, and quality dishes.  This is why local food vendors are my go-to.  They offer an array of unique ingredients that I couldn’t otherwise find. Exotic spices, fruits, veggies, liquors…they all offer a taste component that can make your dish stand apart from everyone else’s. There’s nothing like shopping an authentic Indian spice shop, a local Asian food market, or the pop-up farmers markets in the park.

IMG_6724

Local shops also offer the freshest of the fresh. Seeing as small business does not have the reach that big business does, you can rest assured that they are most likely going from farm to table. That’s why most local vendors are offering mainly organic, preservative free, produce.  When the product is only traveling a few miles from the farms and onto shelves there’s no need to pump the produce full of preservatives; however big business often imports from further away places (cheaper for them); hence the need to artificially ensure the food can last the days, upon days, of travel time before it actually reaches the store. This is an unfortunate necessity of chain stores. The idea of importing, more like transporting, from local farms/vendors leads me to my next point.

Local Businesses Support Local Businesses: Since small businesses don’t have the largest reach, the likely hood that they are also supporting local vendors and farmers to stock their shelves is huge.  By doing so they are recycling their money, and yours, back into other local businesses; hence back in the community. This encourages local job growth, which is my next pro.

Job Growth: By shopping local you are creating a cycle of positive outcomes.  The more you spend locally, the more of your money is being recycled to other local venders.  The better local vendors are doing, the more employees they will need to keep up with the work orders.  The more employees they need, the more employed your community becomes. The more people that are employed by local vendors the greater the effect of this cycle, which results in a stronger, more fiscally advantageous community.

FullSizeRender (12k)

Community: Did you know that non-profit organizations like your children’s after school teams, local food banks, community events, etc., receive almost 3x more funding from local venders than they do from large chains? It’s true.  Local businesses support a healthy community, both with sustenance and with community outreach. They care about what their buyers want.

Caters to Your Needs: Big business only puts on their shelves, what they want you to buy.  The easy sell.  It’s this truth that greatly reduces your ability to be creative in the kitchen, and in many other avenues of your life.

One of my favorite aspects of Small Business, is that we have a voice. Small businesses almost always offer (even encourage), custom orders, inventory recommendations, and a friendly familiar face.  They provide quality goods that you can’t find elsewhere, because they have smaller audience to cater to.

As supporters and pillars of the community, the local vendor is an important business to support.


Food for Thought

The Way the Cookie Crumbles

December 16, 2014

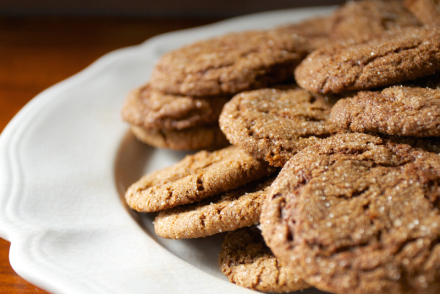
For years I’ve been making spiced cookies for my family and friends; and for years I’ve been asked what’s the difference between the three most common spiced cookies: Snickerdoodle, Gingerbread, and Ginger Snaps.  The truth is, they are all very similarly composed cookies, with a few different ingredients and cooking techniques that drastically change the taste and structure of each cookie.

snickerdoodles

Photo Credit: Recipe Muse

The history of the Snickerdoodle is up for much debate. Could be Dutch, could be German, or could be from New England of the United States.  Origin aside, the snickerdoodle is the most sought after spiced cookie there is, and it couldn’t be easier to make.

Many of the ingredients are the same ingredients used in gingersnaps and gingerbread (i.e. flour, baking powder, butter, eggs, cinnamon, and sugar); but this cookie differs as the spices (a cinnamon/sugar blend) are not mixed into the cookie dough.  The simple spice mixture instead coats the outside of the dough, hence providing this treat with several layers of different flavors; a spicy, yet sugary outer layer and a simple and sweet center.  This differs from the Gingerbread and Ginger Snap cookies, which are instead a conglomerate of ingredients mixed together and baked in unison.

Spices for Christmas cakes

Photo Credit: PunchBowl.com

Gingerbread has been around for centuries, in one form or another, but was introduced to England from the Middle East around the 11th century.

During the 16th century the recipe had been perfected, to what we know and love today, by none other than Queen Elizabeth.  It was she who made the treat with flour, rather than breadcrumbs (as previously baked), and made them into the shapes of dignitaries. This became an immediate trend, which has resulted in the eventual production of Gingerbread men and even later production of the Gingerbread House, as inspired by the tale of Hansel and Gretel in the 19th century.

As mentioned, the cookie is a mixture of flour, eggs, cinnamon and sugar, and is spiced with ginger, cloves, nutmeg, cardamom and anise.  The ingredients are all mixed, rolled out, cut using shaped molds and baked accordingly.  The tradition can be further executed by topping the classic cookie with white icing to bring out the details of each figure.

Gingersnap

Photo Credit: MixedGreensBlog.com

Ginger Snaps are simply a variation of the traditional Gingerbread cookie.  They’re known for their crisper quality; their “snap” if you will.

Introduced in colonial times, the main differences between Gingerbread and Ginger Snaps are a longer bake time for an extra crisp and the use of molasses versus sugar.  Molasses was used as substitute for sugar as it was the more affordable alternative to sweetening.

The debates of which are better, soft vs. crispy, spicy vs. sweet, has been a topic of baking discussions since…ever! This is why most classic recipes come with a variety of ways to execute.

Between the Snickerdoodle, Gingerbread, and Gingersnap, there is something for everyone to enjoy!

Desserts

“Candy Cane” Macaron

December 6, 2014

I’ve made tons of Macarons in the past; I even had a #MacaronWeek, but to date this has certainly been my most creative twist on this classic cookie.

The result couldn’t have been more festive and tasteful!  This is definitely a recipe you’ll give yourself a nice pat on the back after achieving.

Hope you enjoy my “Candy Cane” Macarons.

Screen Shot 2014-12-05 at 3.23.15 PM

In a medium sized mixing bowl add 1 medium egg white and begin to whisk until slightly frothy.

Screen Shot 2014-12-05 at 3.23.55 PM

Add 20g of granulated sugar and continue to whisk for 5-7 minutes until they it forms soft peaks.

Screen Shot 2014-12-05 at 3.24.33 PM

In a separate large mixing bowl sift together 65g of powdered sugar…

Screen Shot 2014-12-05 at 3.24.45 PM

Screen Shot 2014-12-05 at 3.24.55 PM

…and 55g of almond meal.

Screen Shot 2014-12-05 at 7.11.23 PM

Next, fold a third of the meringue into the sifted sugar and almond meal and continue this process until the batter resembles flowing lava.

Screen Shot 2014-12-05 at 3.27.16 PM

Transfer the batter to a piping bag thats fitted with a medium round metal pastry tip.

Screen Shot 2014-12-05 at 3.27.43 PM

Begin piping quarter sized circles  onto a baking tray that’s lined with parchment or a mat, leaving about an inch space in between each circle.

Screen Shot 2014-12-05 at 3.29.34 PM

Give the tray a few taps on the counter to even out the circles and allow to dry for 20 minutes.

Screen Shot 2014-12-05 at 3.30.05 PM

Once dry, sprinkle or flick a little red dye mix with water right on top of the dried macarons.

Screen Shot 2014-12-05 at 3.30.26 PM

Then bake in a 325f oven for 15 minutes.

Screen Shot 2014-12-05 at 3.31.10 PM

For the ganache, bring 1/4 cup of heavy cream…

Screen Shot 2014-12-05 at 3.31.21 PM

…and 1 tbsp of peppermint extract to a simmer.

Screen Shot 2014-12-05 at 3.30.54 PM

Add 1 cup of chopped white chocolate to a metal a mixing bowl.

Screen Shot 2014-12-05 at 3.32.15 PM

Slowly pour the hot cream mixture over the center of the chopped chocolate and begin string until well combined.

Screen Shot 2014-12-05 at 3.33.58 PM

Transfer half of the ganache to a piping bag fitted with a metal round tip.

Screen Shot 2014-12-05 at 3.34.35 PM

Then mix 1 tsp of red dye with the other half of the ganache.

Screen Shot 2014-12-05 at 3.34.55 PM

Transfer it to the other side of the same piping bag. Let this rest for 20 minutes before use.

Screen Shot 2014-12-05 at 3.35.44 PM

Take the macarons out of the oven and allow to cool for 30 minutes before filling, but once they’ve cooled down pipe a 1-2 tbsp of filling into the center of the macaron.

Screen Shot 2014-12-05 at 3.36.18 PM

Sandwich it between another cookie.

Screen Shot 2014-12-05 at 3.22.17 PM

Eat them right away or allow to mature for 24 hrs. ENJOY!

[amd-zlrecipe-recipe:9]

Screen Shot 2014-12-12 at 12.54.48 PM

| Top Left: All-Clad Sauce Pan | Top Middle: Baking Sheet | Top Right:Glass Bowl Set |
| Bottom Left: All-Clad Bowl Set | Bottom Middle:All-Clad Strainer |

 
Main Course

Brown Butter Pumpkin Tortellini

November 27, 2014

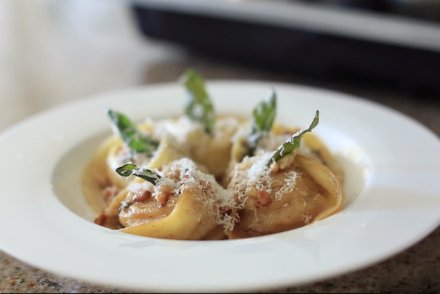
#PumpkinWeek continues with a savory Brown Butter Pumpkin Tortellini!

If you’ve never made pasta from scratch I highly recommend it, and I  have a past video entirely dedicated to the process.

This is a mouth watering recipe, perfect for the holidays and an all around crowd pleaser. Enjoy!!

Screen Shot 2014-11-26 at 12.31.22 PM

Start by quartering a medium sized (3-4lb) pumpkin.

Screen Shot 2014-11-26 at 12.31.47 PM

Remove the seeds.

Screen Shot 2014-11-26 at 12.32.08 PM

Place the quartered pumpkin onto a baking tray.

Screen Shot 2014-11-26 at 12.32.23 PM

Drizzle 1-2 Tbsp of olive oil over the top…

Screen Shot 2014-11-26 at 12.32.55 PM

…and season with a pinch of salt and fresh cracked black pepper.

Screen Shot 2014-11-26 at 12.33.14 PM

Cover with aluminum foil and bake in a 450f oven for 1-2 hours.

Screen Shot 2014-11-26 at 12.33.32 PM

In a medium size mixing bowl whisk together 4 egg yolks…

Screen Shot 2014-11-26 at 12.34.06 PM

…1 Tbsp of olive oil…

Screen Shot 2014-11-26 at 12.33.44 PM

…and a pinch salt.

Screen Shot 2014-11-26 at 12.36.00 PM

Add the flour to the egg mixture, one cup at a time, until the mixture is slightly tacky, but not sticky.

Screen Shot 2014-11-26 at 12.37.17 PM

Pour the loose dough onto a counter top and begin working it together with your hands.

Screen Shot 2014-11-26 at 12.38.12 PM

Vigorously knead the dough for 5 minutes.

Screen Shot 2014-11-26 at 12.38.45 PM

Then, cover with plastic and set aside until ready to use.

Screen Shot 2014-11-26 at 12.39.01 PM

Once the quartered pumpkin is very tender and the outside of the skin has a deep roasted color, pull it out of the oven.

Screen Shot 2014-11-26 at 12.39.53 PM

Remove the meat from the skin and place it into a large mixing bowl.

Screen Shot 2014-11-26 at 12.40.29 PM

Add 2 egg yolks…

Screen Shot 2014-11-26 at 12.41.06 PM

…1 tbsp sliced sage and 1/4 cup of grated parmesan.

Screen Shot 2014-11-26 at 12.41.37 PM

Add 1 tsp ground nutmeg…

Screen Shot 2014-11-26 at 12.41.16 PM

…and a pinch of salt and pepper.

Screen Shot 2014-11-26 at 12.42.08 PM

Mix until the all of the ingredients are thoroughly combined and the mixture is relatively smooth.

Screen Shot 2014-11-26 at 12.42.53 PM

Transfer the filling into a piping bag and reserve until ready to use.

Screen Shot 2014-11-26 at 12.43.22 PM

Screen Shot 2014-11-26 at 12.43.40 PM

Roll the pasta dough into very thin sheets with a pasta machine and/or rolling pin.

Screen Shot 2014-11-26 at 12.44.29 PM

Cut out 4-5 inch circles from the sheets with a ring cutter and remove the excess dough.

Screen Shot 2014-11-26 at 12.45.09 PM

Dollop 2 Tbsp of pumpkin filling into the center of the pasta rounds.

Screen Shot 2014-11-26 at 12.45.48 PM

Rub a small amount of water around the edges of the pasta.

Screen Shot 2014-11-26 at 12.46.09 PM

Fold the pasta over the filling into a half moon shape and seal the edges of the pasta so that no filling can escape.

Screen Shot 2014-11-26 at 12.46.33 PM

Wrap one edge of the pasta around your index finger creating a plump center bulge. Press the ends together and repeat until all of the tortellinis are formed.

Screen Shot 2014-11-26 at 12.47.26 PM

Get a pot of boiling salted water going and cook the tortellinis for 5-7 minutes.

Screen Shot 2014-11-26 at 12.48.03 PM

Add 3 Tbsp of butter to a large nonstick sauté pan on medium-high heat and begin browning the butter.

Screen Shot 2014-11-26 at 12.48.13 PM

Next toast 2 Tbsp of pine nuts in the brown butter.

Screen Shot 2014-11-26 at 12.49.24 PM

Add the cooked/strained tortellinis…

Screen Shot 2014-11-26 at 12.48.39 PM

…the juice of half a lemon…

Screen Shot 2014-11-26 at 12.50.03 PM

…and a pinch of salt and pepper.

Screen Shot 2014-11-26 at 12.50.46 PM

Plate the tortellinis in a small shallow bowl.

Screen Shot 2014-11-26 at 12.51.09 PM

Top with a spoonful of the brown butter and toasted pine nuts.

Screen Shot 2014-11-26 at 12.53.05 PM

Add some freshly grated parmesan cheese…

Screen Shot 2014-11-26 at 12.51.27 PM

…and top with fried basil for a tasty garnish.

Screen Shot 2014-11-26 at 12.52.11 PM

Screen Shot 2014-11-26 at 12.52.34 PM

All that’s left to do is to ENJOY!!

[amd-zlrecipe-recipe:10] 

Screen Shot 2014-11-26 at 4.35.56 PM

| Top Left: All-Clad Sauce Pan | Top Middle: Shallow Bowl Set | Top Right: Pasta Maker |
| Bottom Left: All-Clad Saute Pan | Bottom Middle: Baking Sheet | Bottom Right: Shun Kaji Knife Set |
 
Breakfast, Desserts

Pumpkin Cinnamon Rolls

November 13, 2014

This new recipe left me with one happy household, and I’m certain it’ll do the same for you!

 It is pretty hard to go wrong with homemade cinnamon rolls, but with a #PumpkinWeek twist these “Pumpkin Cinnamon Rolls” really hit the seasonal spot and left my house smelling delicious.

Great dish for Fall, and perfect breakfast treat for all of you Pumpkin connoisseurs.

Screen Shot 2014-11-13 at 10.15.04 AM

Start off by adding 1/4 cup of milk to a medium sauce pan.

Screen Shot 2014-11-13 at 10.16.42 AM

Add in 1/4 cup of granulated sugar…

Screen Shot 2014-11-13 at 10.15.35 AM

…1 tbsp dry active yeast…

Screen Shot 2014-11-13 at 10.16.31 AM

…4 tbsp of unsalted butter…

Screen Shot 2014-11-13 at 10.15.18 AM

 …and 4 tbsp of pumpkin puree.

Screen Shot 2014-11-13 at 10.18.14 AM

Heat the mixture until it reaches 95f or slightly above room temperature.

Screen Shot 2014-11-13 at 10.18.35 AM

Then pour it into a large mixing bowl or the bowl of a electric stand mixer and allow to ferment for 15 minutes.

Screen Shot 2014-11-13 at 10.19.24 AM

Next, add 1 cup of flour to the same bowl and mix for minutes on low speed.

Screen Shot 2014-11-13 at 10.19.37 AM

Then add the rest of the flour and knead for another 5 minutes until the ingredients form a smooth ball of dough.

Screen Shot 2014-11-13 at 10.20.34 AM

Coat a large mixing bowl with canola oil or butter, then transfer the dough to the greased bowl.

Screen Shot 2014-11-13 at 10.21.18 AM

Flip it upside down, and cover it with plastic.

Screen Shot 2014-11-13 at 10.22.27 AM

Allow this to sit for 1 hour in a warm place in your kitchen until it doubles in volume.

Screen Shot 2014-11-13 at 10.23.12 AM

After the dough has doubled in size, take it out of the bowl and onto a flour working surface.

Screen Shot 2014-11-13 at 10.24.19 AM

Lightly flour the top and sides of the dough and begin rolling it out to about the thickness of your index finger.

Screen Shot 2014-11-13 at 10.24.37 AM

Mix 1 tsp of ground nutmeg, clove, mace, allspice, ginger, 1 tbsp of cinnamon, and 1/2 cup of granulated sugar in a small mixing bowl.

Screen Shot 2014-11-13 at 10.25.45 AM

Brush the top of the dough with melted butter.

Screen Shot 2014-11-13 at 10.29.40 AM

Then generously coat the buttered dough with the spiced sugar mixture.

Screen Shot 2014-11-13 at 10.30.35 AM

Roll the dough up at tight as possible and pinch the end seam together so they don’t come apart during baking.

Screen Shot 2014-11-13 at 10.31.06 AM

Coat your baking dish with butter and begin cutting the roll in 2 inch segments.

Screen Shot 2014-11-13 at 10.31.26 AM

Place the rolls in the buttered baking dish.

Screen Shot 2014-11-13 at 10.31.45 AM

Bake in a 375f oven for 20 minutes.

Screen Shot 2014-11-13 at 10.32.10 AM

In medium mixing bowl add 4 tbsp soft butter…

Screen Shot 2014-11-13 at 10.32.51 AM

…1/3 cup of whipped cream cheese…

Screen Shot 2014-11-13 at 10.33.15 AM

…1 1/2 cup powdered sugar…

Screen Shot 2014-11-13 at 10.32.34 AM

…1 tbsp vanilla paste and 1-2 tbsp of whole milk.

Screen Shot 2014-11-13 at 10.33.57 AM

Mix until silky smooth and reserve until ready to use.

Screen Shot 2014-11-13 at 10.34.44 AM

Once the rolls are a deep golden brown, pull them out of the oven.

Screen Shot 2014-11-13 at 10.35.23 AM

Allow to cool for 30 minutes.

Screen Shot 2014-11-13 at 10.35.36 AM

Screen Shot 2014-11-13 at 10.36.15 AM

Once they  slightly cooled down generously top the rolls with the cream cheese frosting.

Screen Shot 2014-11-13 at 10.36.52 AM

ENJOY!!

[amd-zlrecipe-recipe:11]

Tools

| Top Left: Kitchen Aid Mixer | Top Middle: Marble Pastry Slab | Top Right: Rolling Pin |

| Bottom Left: All-Clad Sauce Pan | Bottom Middle: All-Clad Measuring Spoons |Bottom Right: Baking Dish |

 
Food for Thought

Seasonal Spices Disected

November 8, 2014

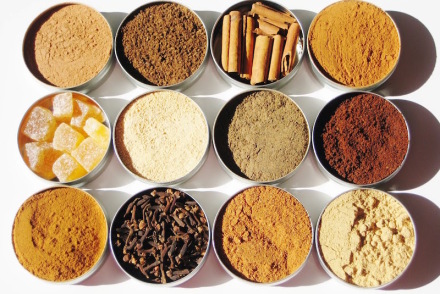
Many of us have cabinets and shelves stacked with a plethora of spices, yet we only use the few that we are familiar with. It’s a shame too, as the world of spices is so vast, easily accessible and open for exploration.  I believe the first step of exploring is understanding what you’re diving into.

In honor of #PumpkinWeek, and in conjunction with my last post, I wanted to do some research to broaden my understanding of the seasonal spices we gravitate towards each fall.  Certainly spices have been used in particular dishes for thousands of years for a reason.  Perhaps if we understand the origin of each spice and a few staple dishes known for the addition of that spice, we can take better advantage of it in our own kitchen.

Photo Credit:  BirdHouseDiaries.com

Photo Credit: BirdHouseDiaries.com

I’m sure we’ve all heard the terms “Cinnamon Bark,” but didn’t quite grasp how literal that phrase is.  Cinnamon is in fact made from the bark of several species of trees in the Cinnamomum family.  The bark of these trees are harvested, dried into cinnamon sticks (natural curling process of drying the bark) and then sold as is or ground into cinnamon powder.

Cinnamon has been used as far back as the BC’s in Egypt and Arabia; times when is was reserved for the elite and thought to be provided by Gods…Now days we have it in almost every cabinet across America, and certainly beyond.

It’s taste is mildly sweet, yet slightly bittersweet.  The aromatic affects of cinnamon are the perfect blend of spicy and sweet. The uses of cinnamon far exceed that of most spices.  Traditionally people associate cinnamon to be used in sweet dishes, such as pastries and dessert drinks; though, did you know cinnamon is also excellent in savory dishes like curries, soups, and many pho dishes?

Photo Credit: MarketManila.com

Photo Credit: MarketManila.com

Did you know also know that Nutmeg and Mace are actually from the same plant?  It’s true.  Nutmeg comes from the pit of the fruit grown on the nutmeg tree, and mace comes from the webbing that surrounds that pit.  They both have similar tastes, though they are discernible.  Nutmeg is moderately sweeter and can be compared to a slightly spicier cinnamon.  Mace has a sharper taste similar to cinnamon and pepper.

It’s this peppery attribute that allows Nutmeg and Mace to be used in more savory dishes, as seen in middle eastern cuisine.  While in European cuisine, nutmeg and mace are used in savory dishes, especially in potato dishes, meats, soups and sauces, as well as some baked goods (sweet dishes).

Ginger also has this versatile quality. Typically used in asian dishes to provide a pungent and spicy zest to each course, ginger can be used in many seasonal treats to add a very aromatic quality to baked goods and beverages.  Whatever its use, ginger is extremely recognizable to our palettes and even more so beneficial to our health.  Ginger should be your staple ingredient for stir fries and teas. Simply sensational.

Cloves

Cloves are renowned for their aromatic qualities.  Very appropriate as they are dried flower buds of the Evergreen Clove Tree. The majority of the time you are smelling something that reminds you of fall, that’s cloves. They’re sweet, pungent and spicy.  The aroma of cloves are warm and inviting. The flavor is strong, given the cloves oily composition, and should be used sparingly as a little goes a long way.  Cloves are great paired with pumpkin pie, pea soup, gingerbread, chili, etc.  Great to make any dish sweeter and more aromatic.

All Spice

If you were to combine all of the spices above, you would have a concoction that smells very similar to our last fall spice, “Allspice.” The name is derivative of this fact alone, though the actual composition of Allspice is merely one ingredient…allspice.  It is made from the dried fruits of an evergreen tree grown solely on the western hemisphere.

Allspice tastes a lot like it smells.  Particularly if you were to combine cinnamon, nutmeg and cloves.  It is sweet and pungent.  Often described as warm.

It lends itself well to many foods including: Jamaican jerk seasoning, ketchup, sausage, soup, pies, pastries, native american chocolate, spiced tea and so on…

Spices

One thing can be said about all spices…They are certainly hard to describe, as they are so unique in they’re own flavor composition that there is little room for comparison.

The best way to know your spices is to experiment yourself.  Take a moment to smell and taste each particular spice and experiment with using them in your cooking.  Always start with a little and build from there. Take note of what you like and don’t like, and in no time you’ll be a Spice Aficionado!