Search results for

cookie cup

Desserts

Ice Cream “Cone” Bites

July 2, 2015

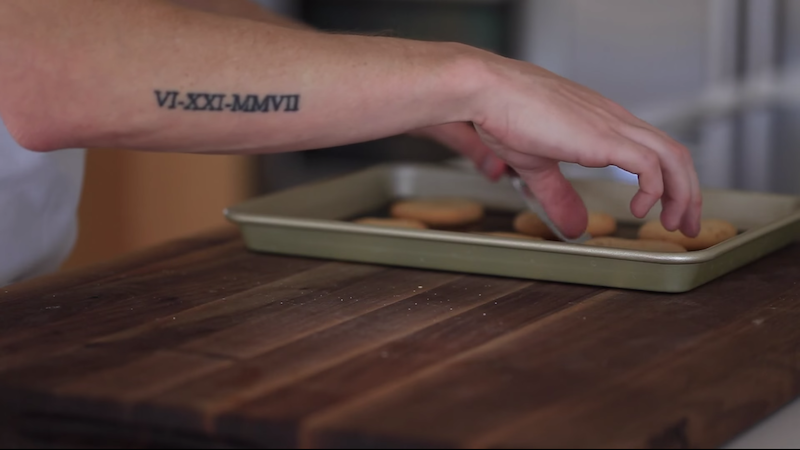
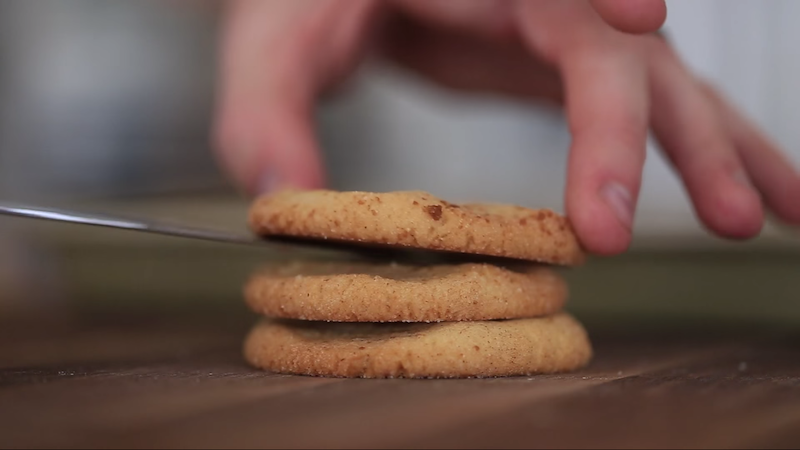
Mixed, baked, chocolate coated, ice cream filled, and ready to eat! I call them, Ice Cream “Cone” Bites, and they’re on a whole other level!

Screen Shot 2015-07-01 at 3.23.22 PM

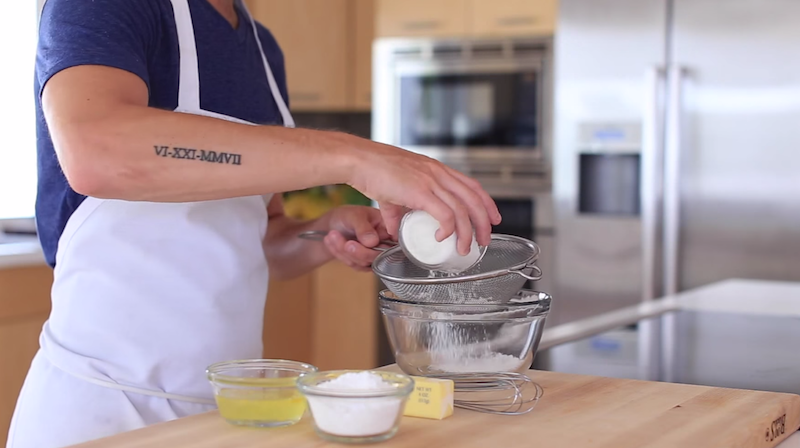
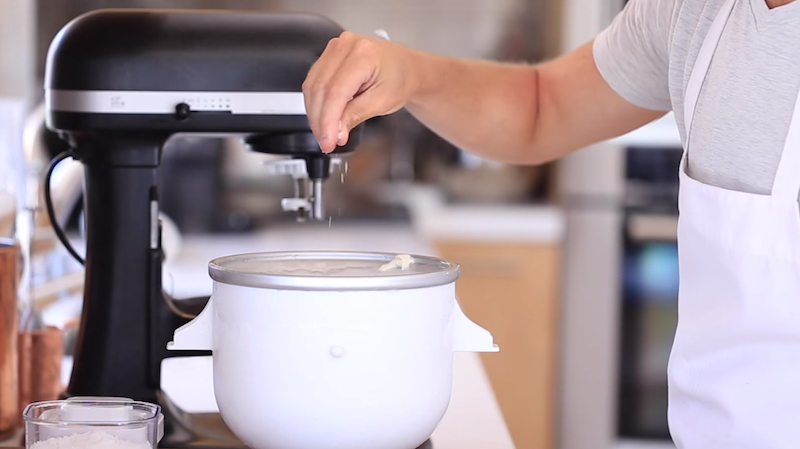
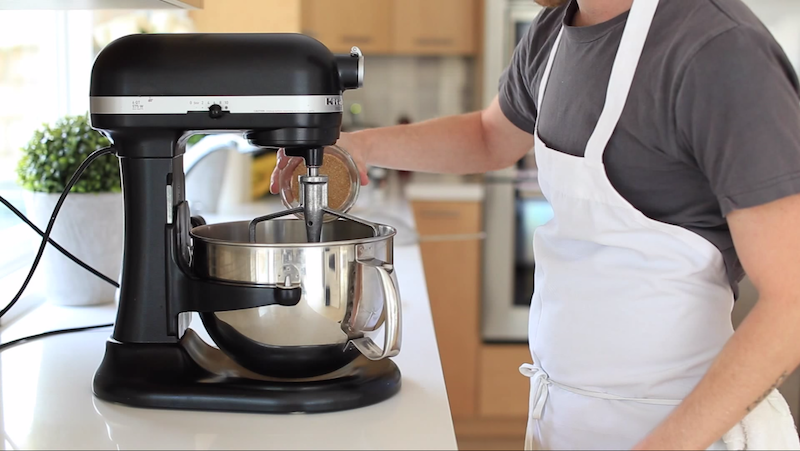
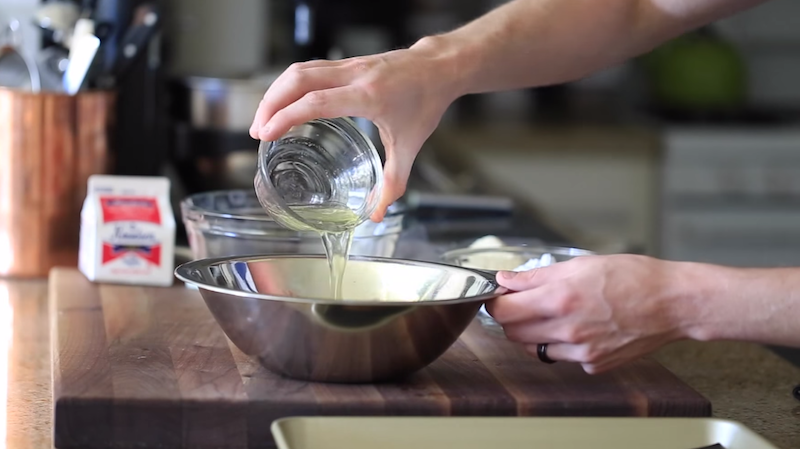
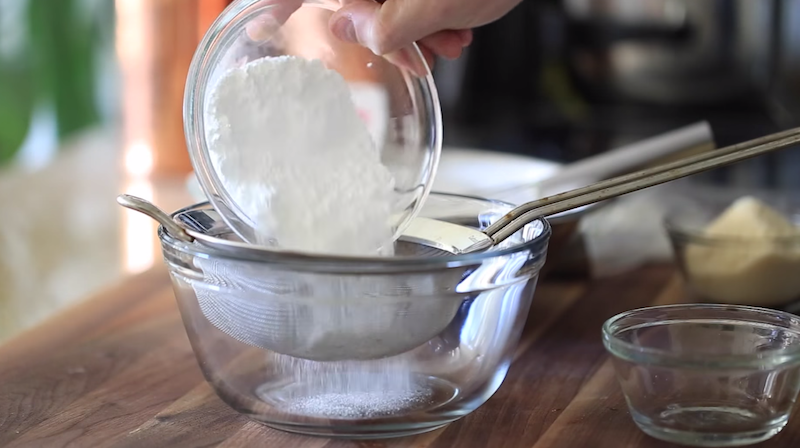
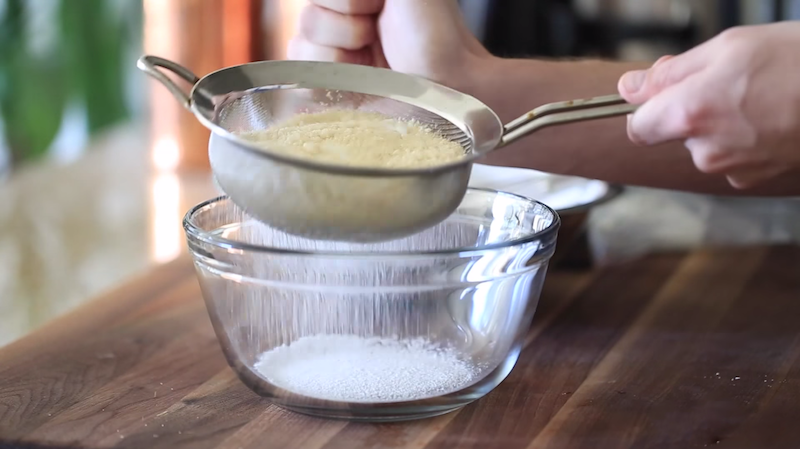
In a medium mixing bowl, sift 1/2 cup of powder sugar…

Screen Shot 2015-07-01 at 3.24.04 PM

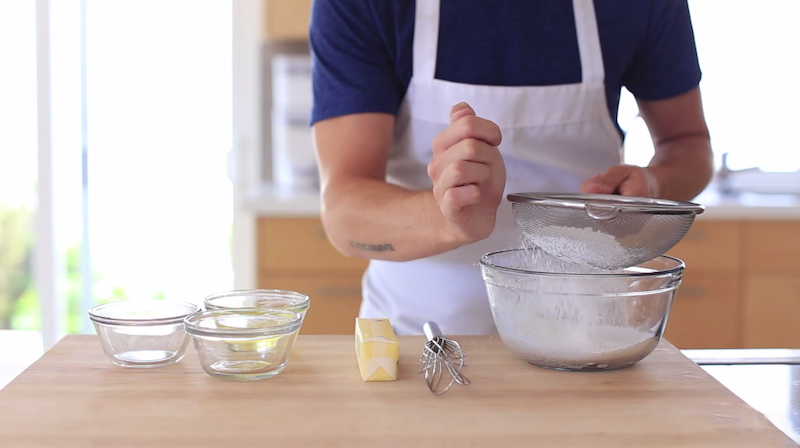
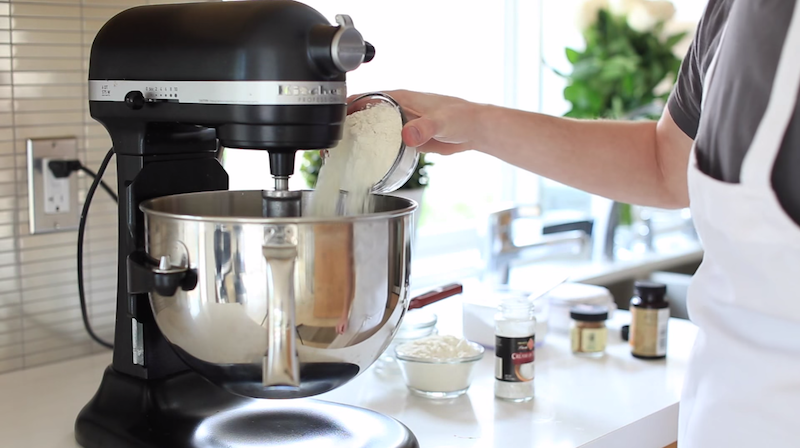
…and 1/2 cup of all-purpose flour.

Screen Shot 2015-07-01 at 3.24.52 PM

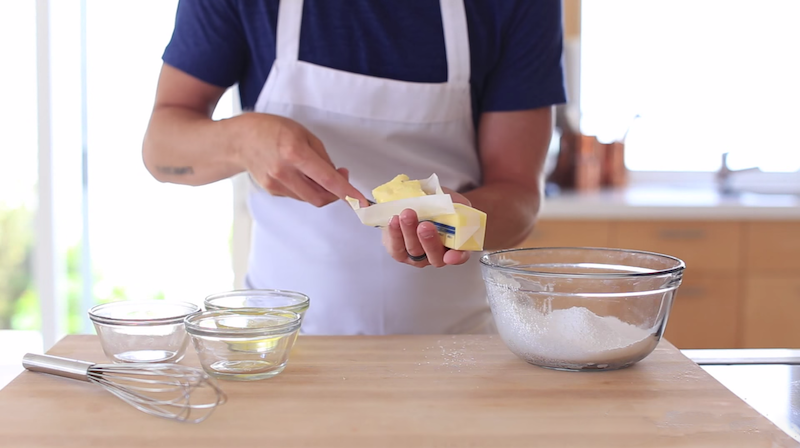
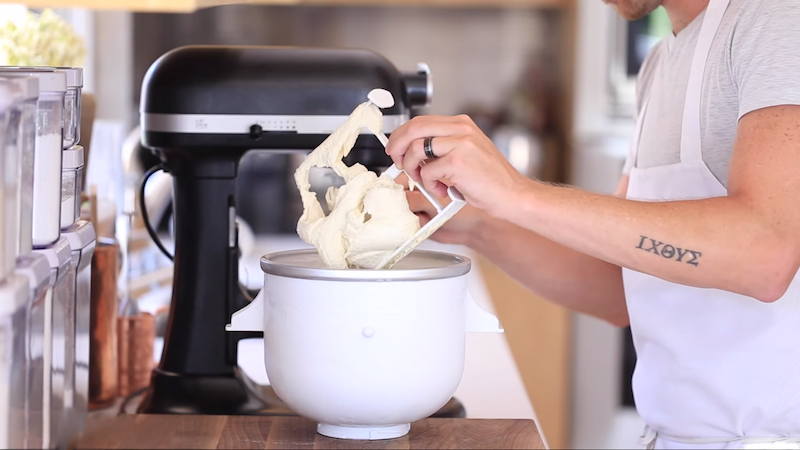
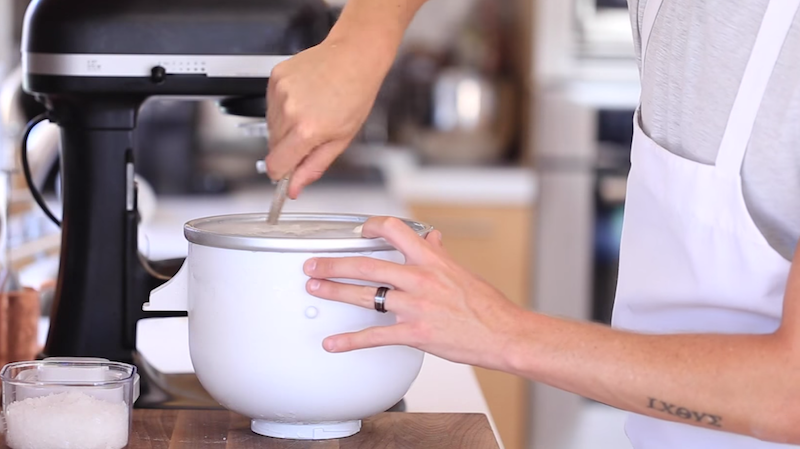
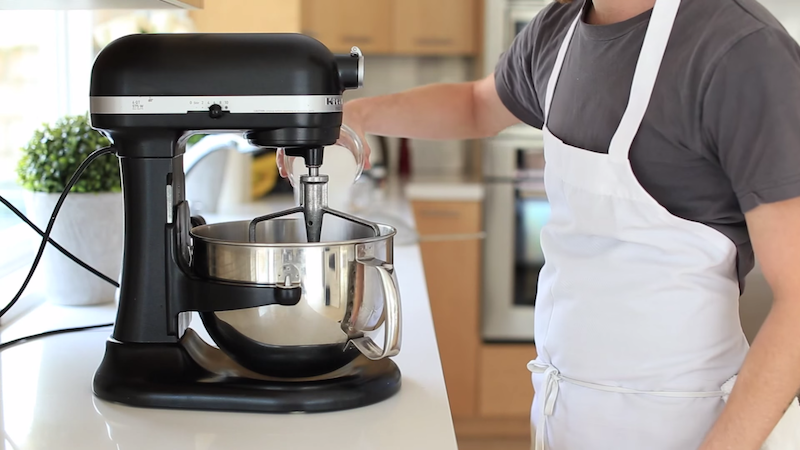
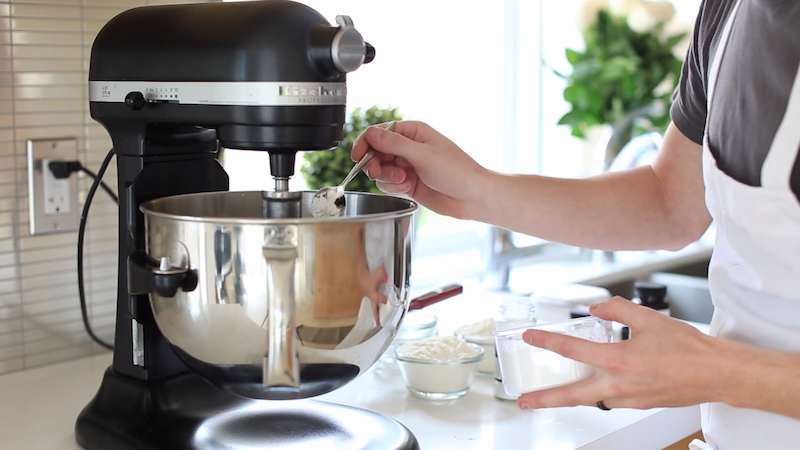
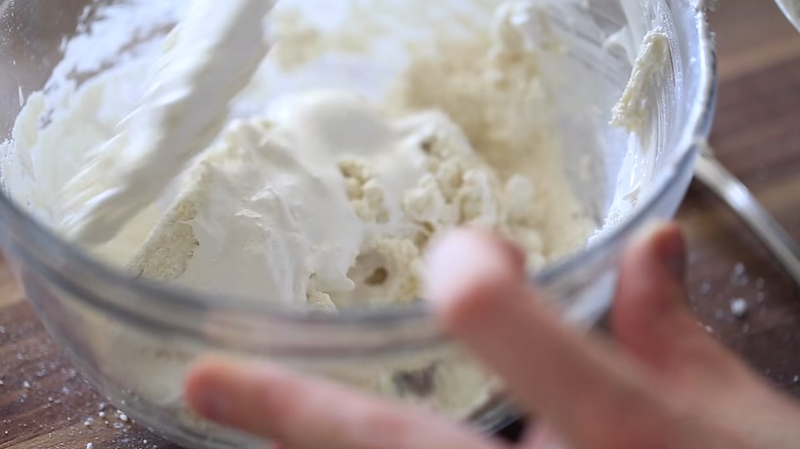
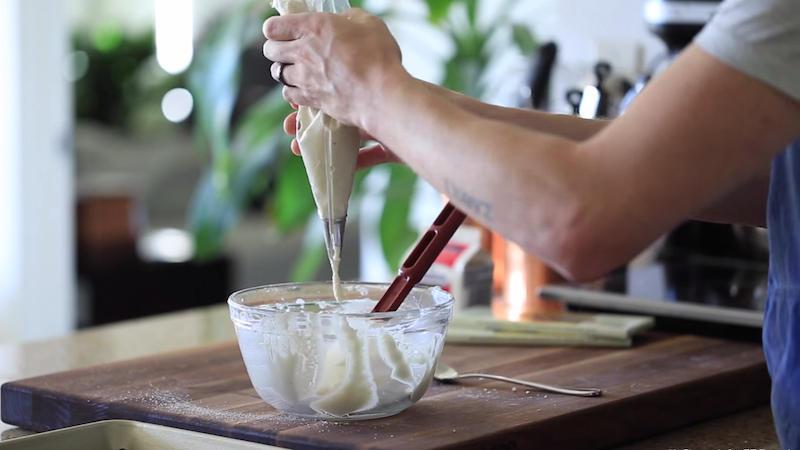
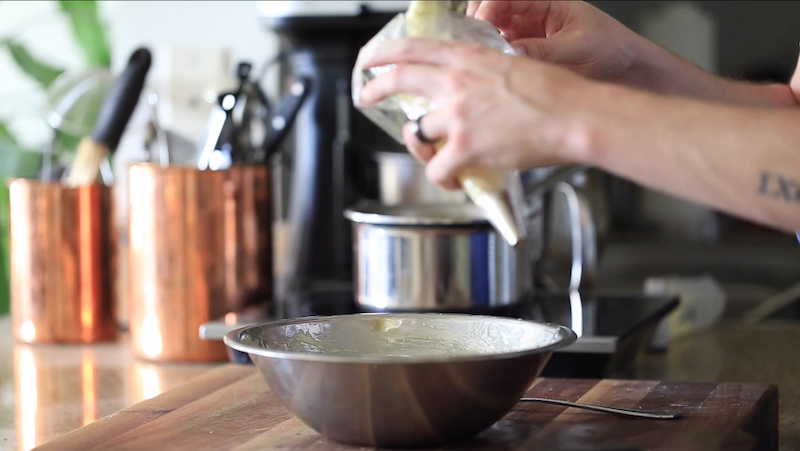
 Add 5 tbsp of unsalted butter and blend ingredients for several minutes.

Screen Shot 2015-07-01 at 3.25.22 PM

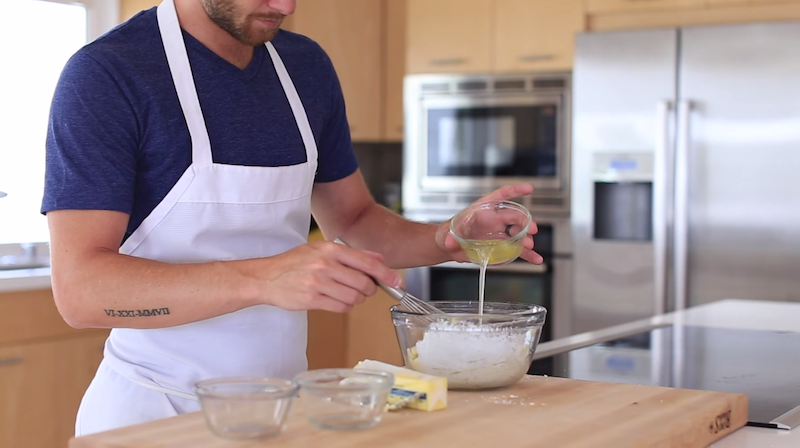
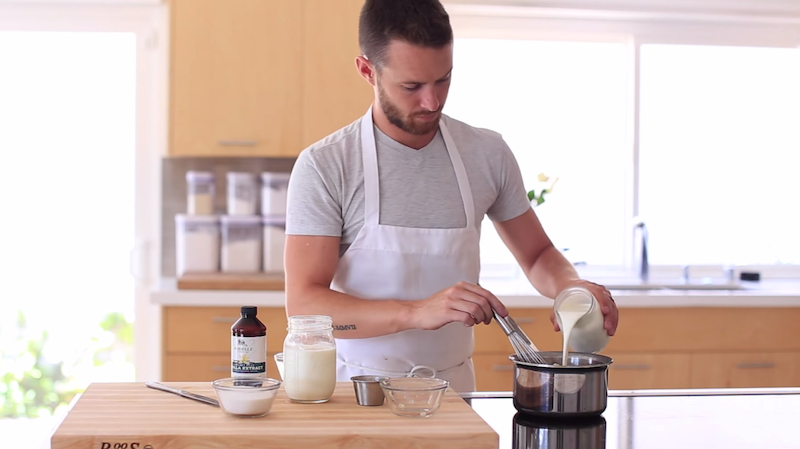
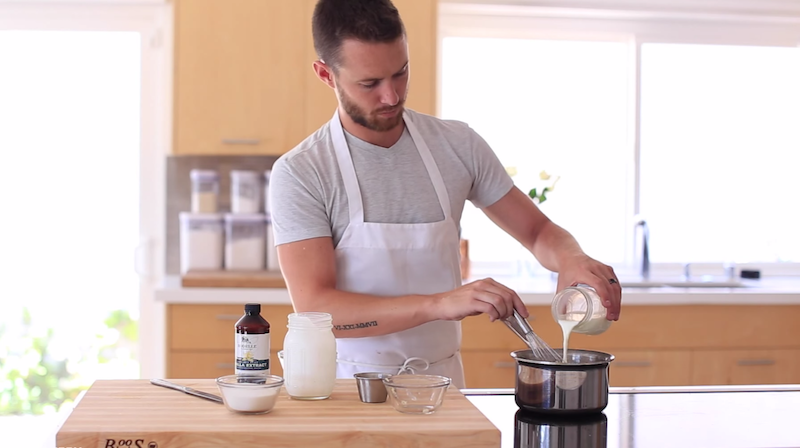
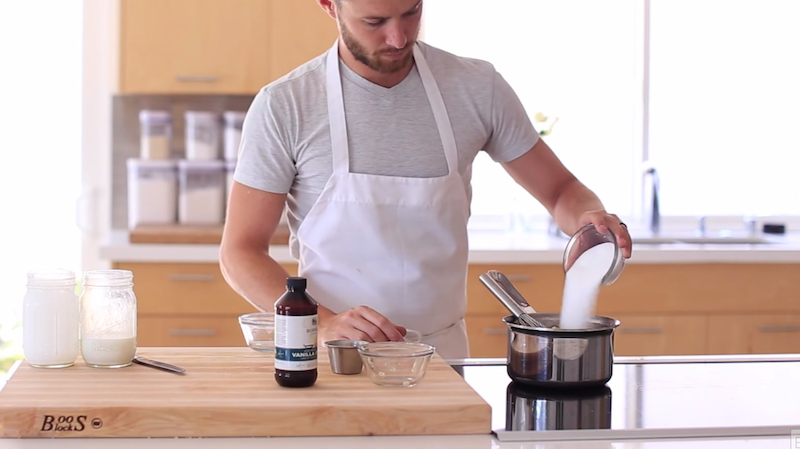
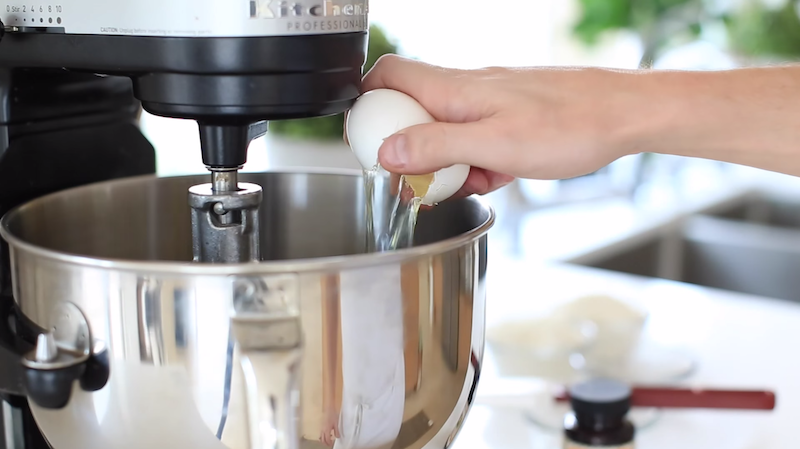
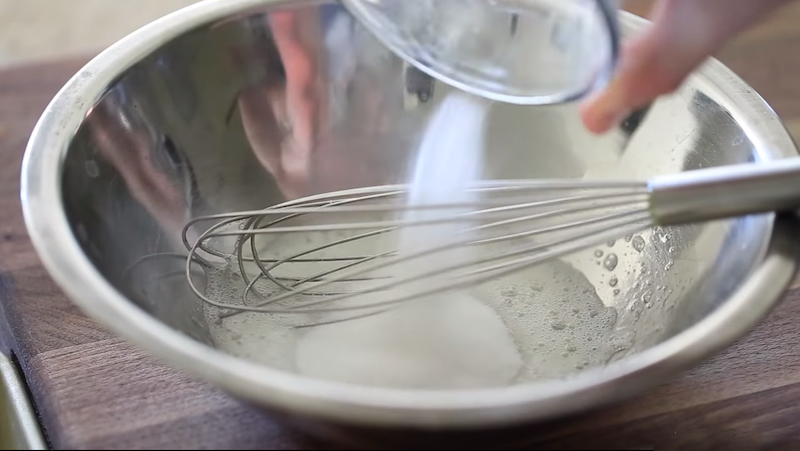
Whisk in 1 large egg white or 2 medium egg whites…

Screen Shot 2015-07-01 at 3.26.32 PM

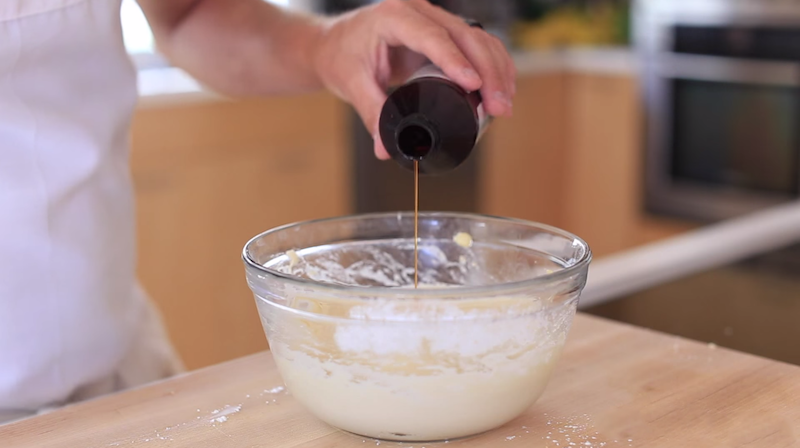
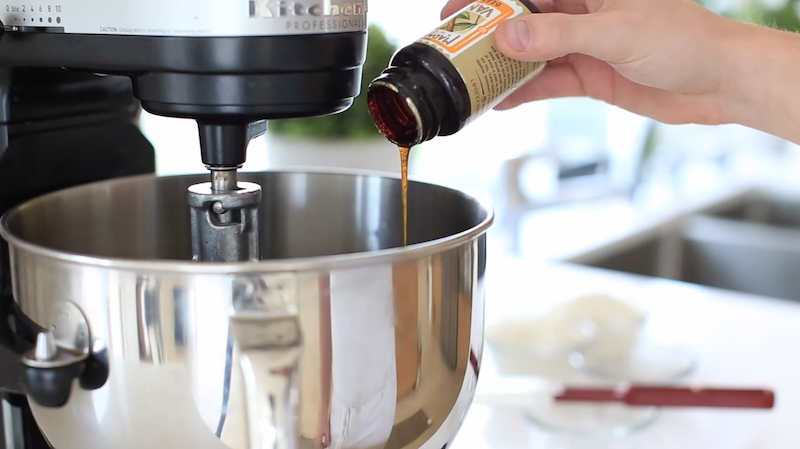
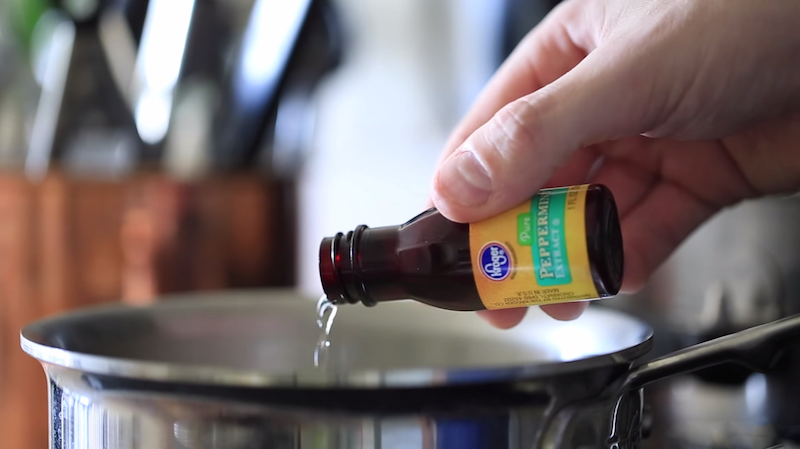
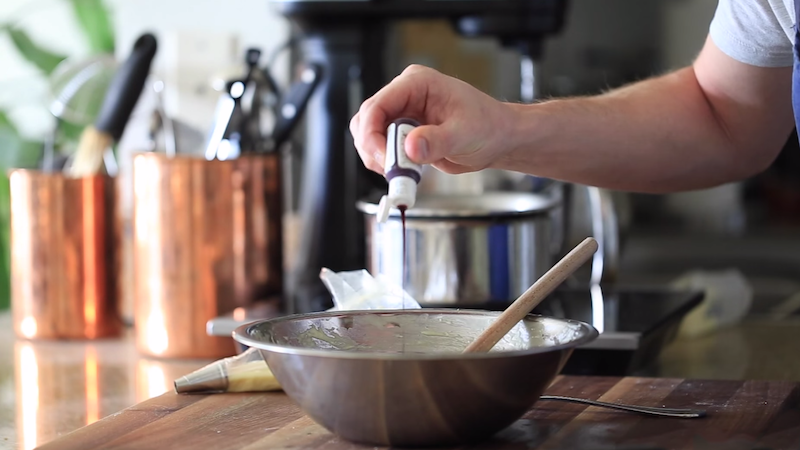
….1 tbsp vanilla extract…

Screen Shot 2015-07-01 at 3.26.51 PM

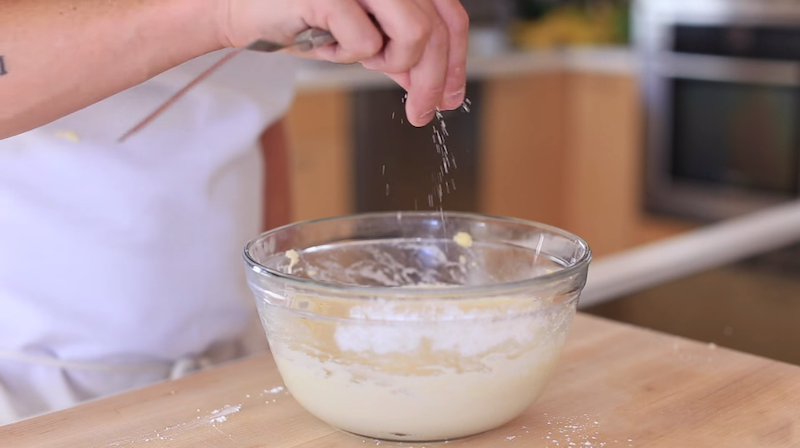
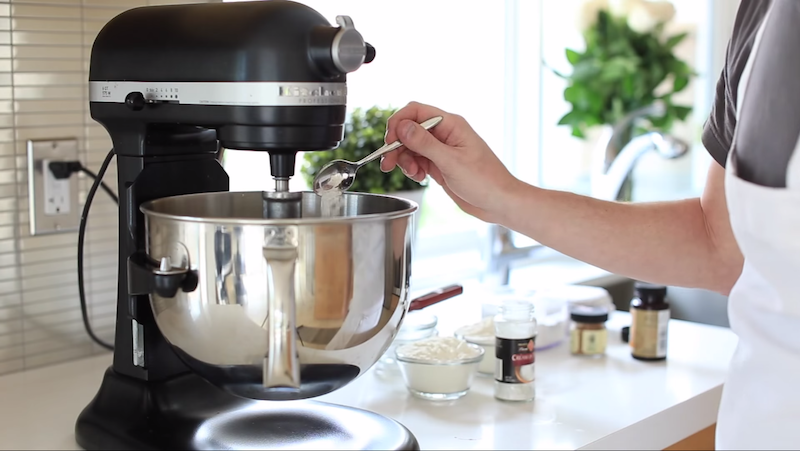
…and a pinch of salt.

Screen Shot 2015-07-01 at 3.26.17 PM

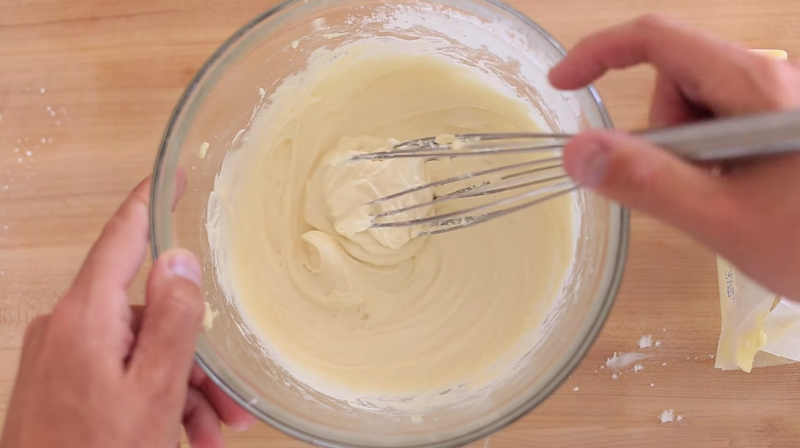
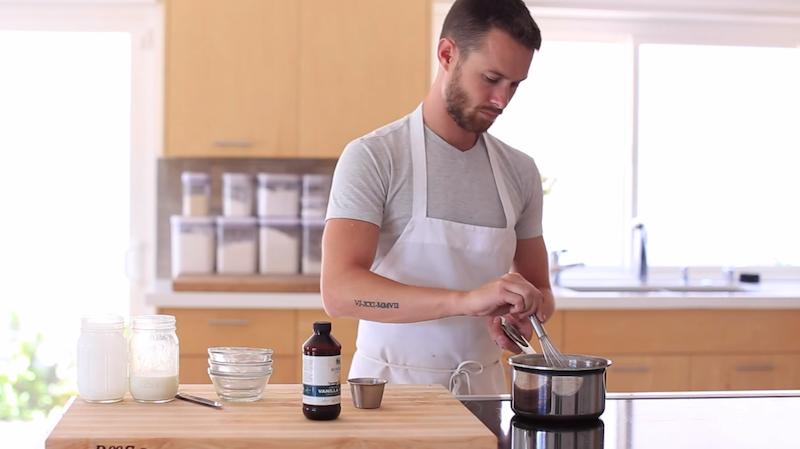
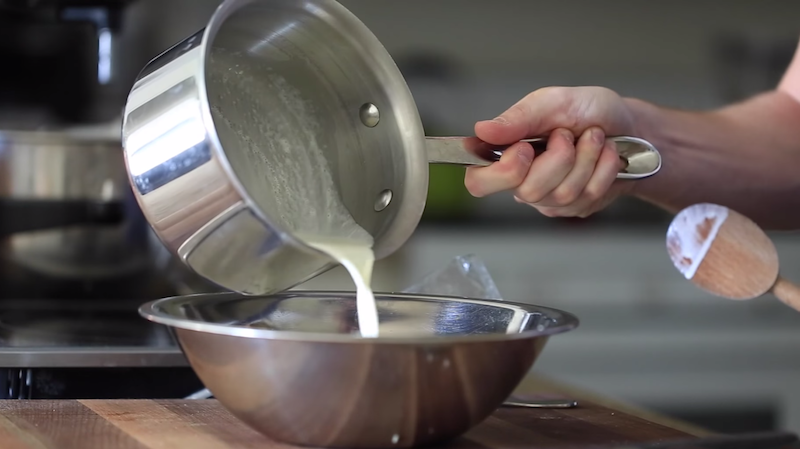
The batter should have a smooth, paste-like texture when ready.

Screen Shot 2015-07-01 at 3.27.39 PM

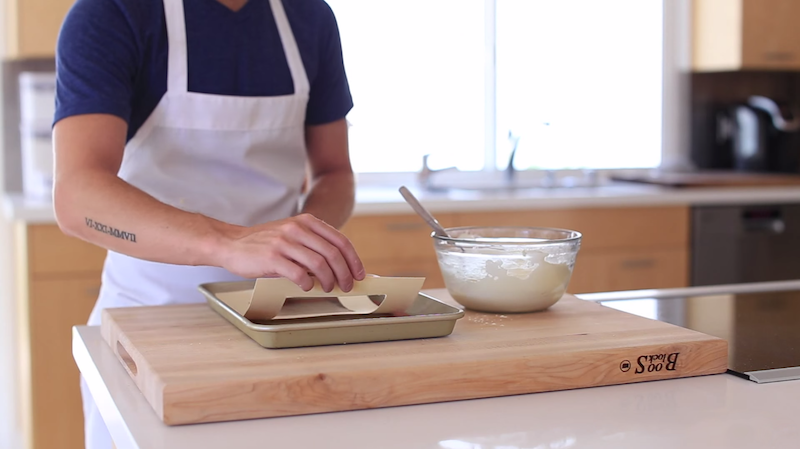
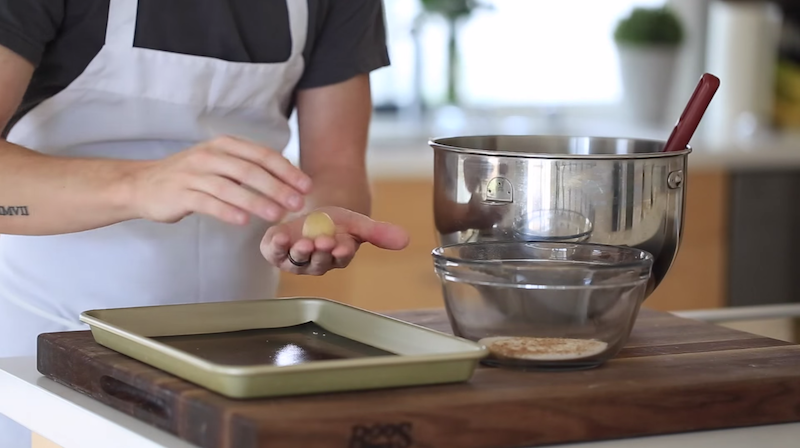
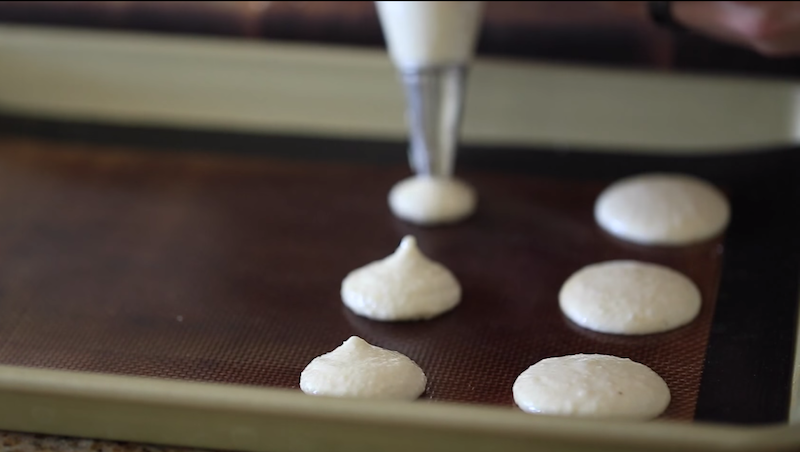
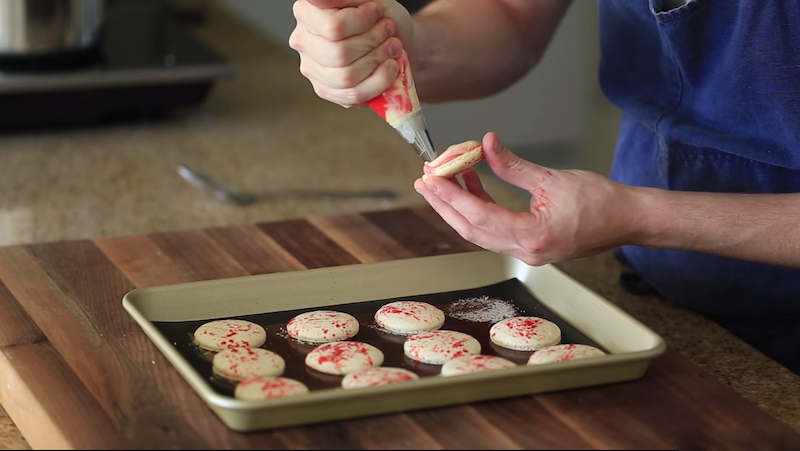
Use a non-stick sheet pan and a rectangle stencil to begin forming the “cones.”

Screen Shot 2015-07-01 at 3.29.13 PM

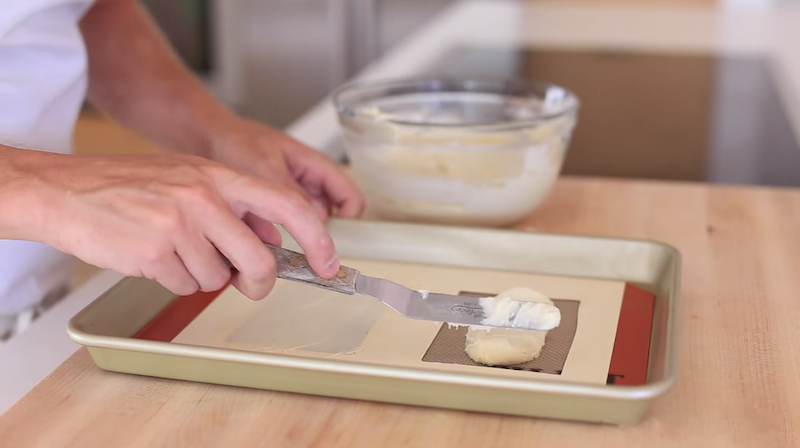
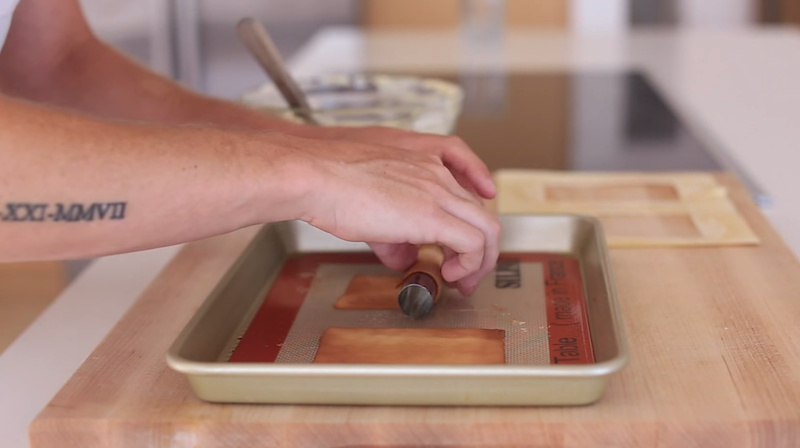
Smear a dollop of batter evening across the stencil.

Screen Shot 2015-07-01 at 3.29.57 PM

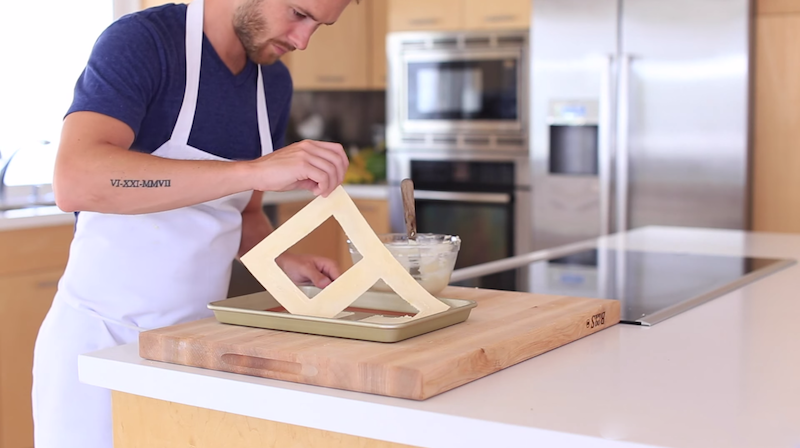
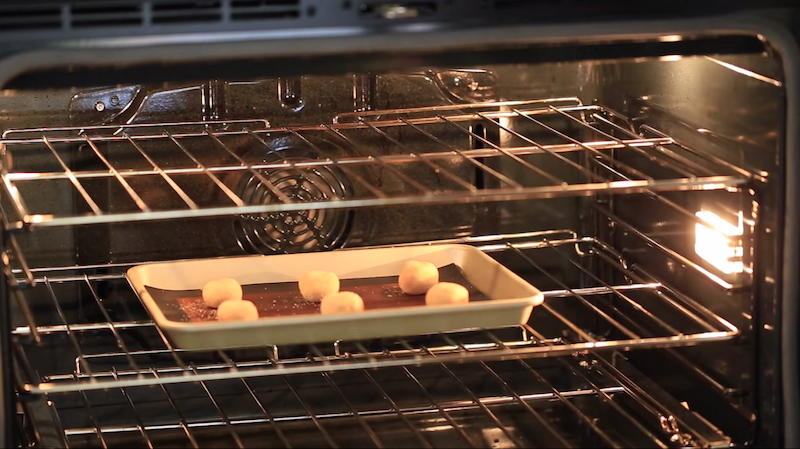
 Remove stencil and bake for 5-7 minutes at 375°F.

Screen Shot 2015-07-01 at 3.30.31 PM

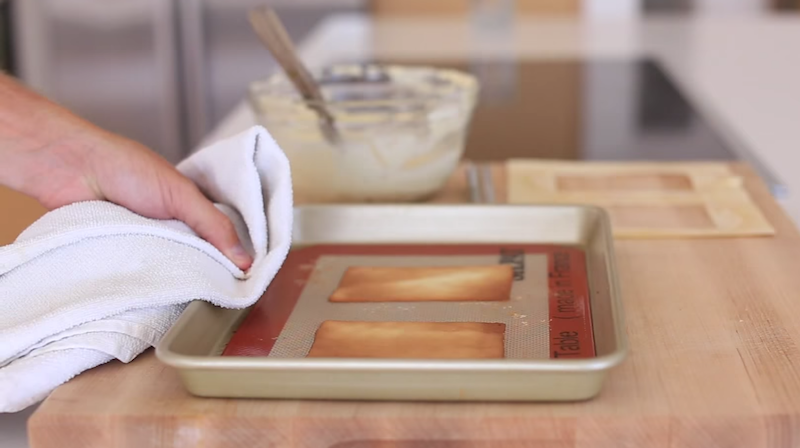
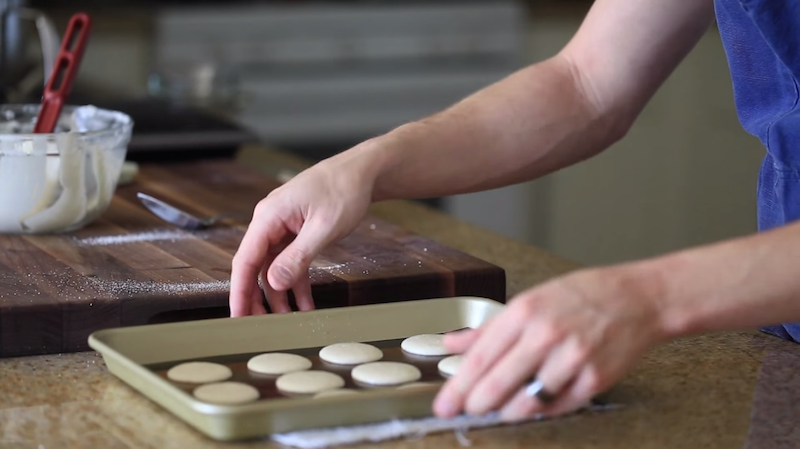
 Once a nice golden-brown, remove from the oven…

Screen Shot 2015-07-01 at 3.31.06 PM

…and begin rolling the hot pliable cookie around a cylinder form.

Screen Shot 2015-07-01 at 3.32.38 PM

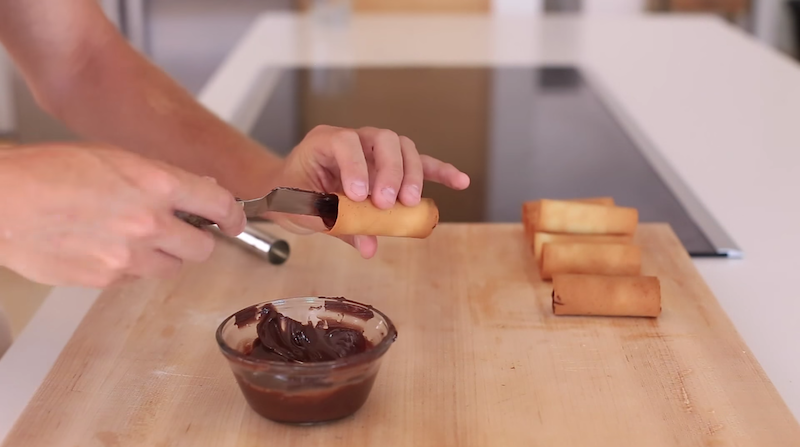
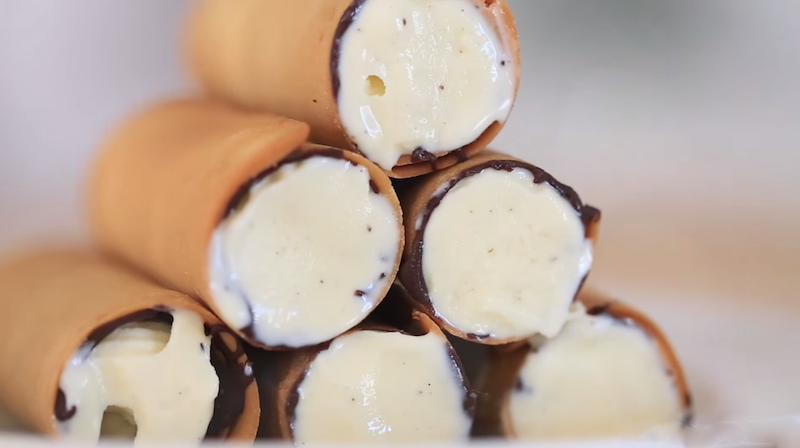
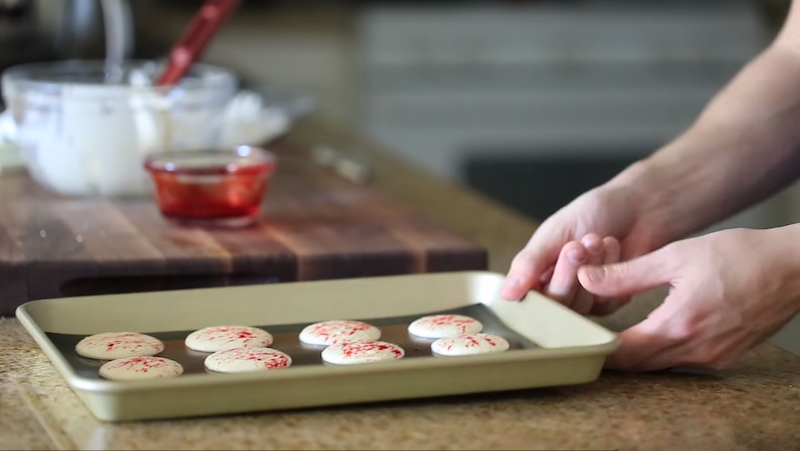
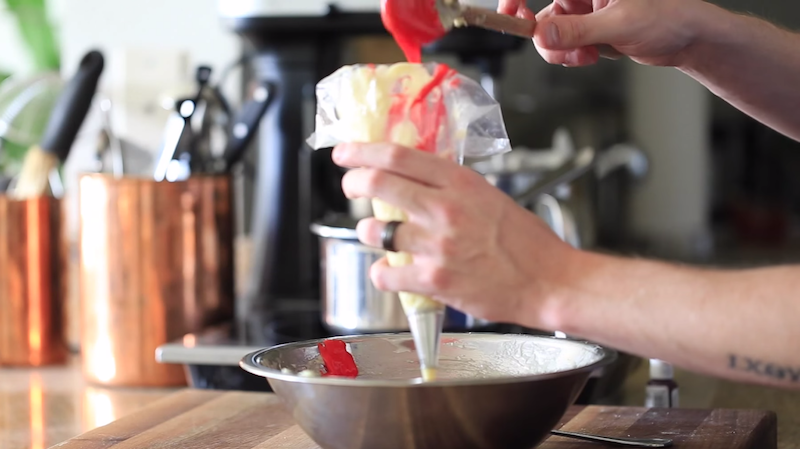
Seal the inside of the cones with a smear of melted dark chocolate.

Screen Shot 2015-07-01 at 3.33.25 PM

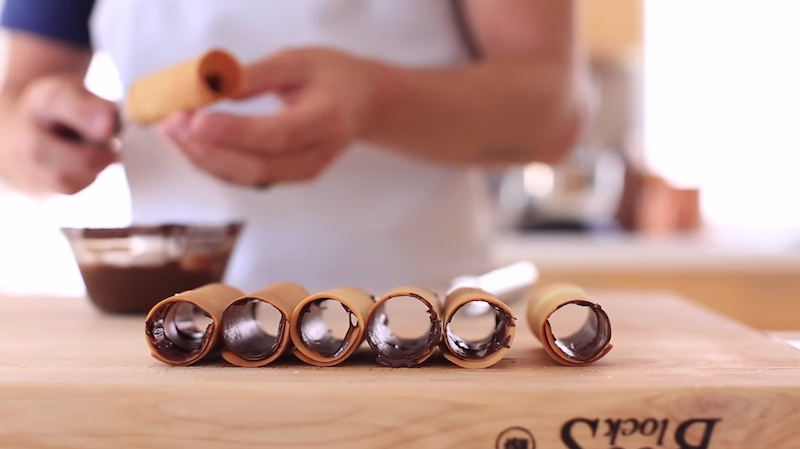
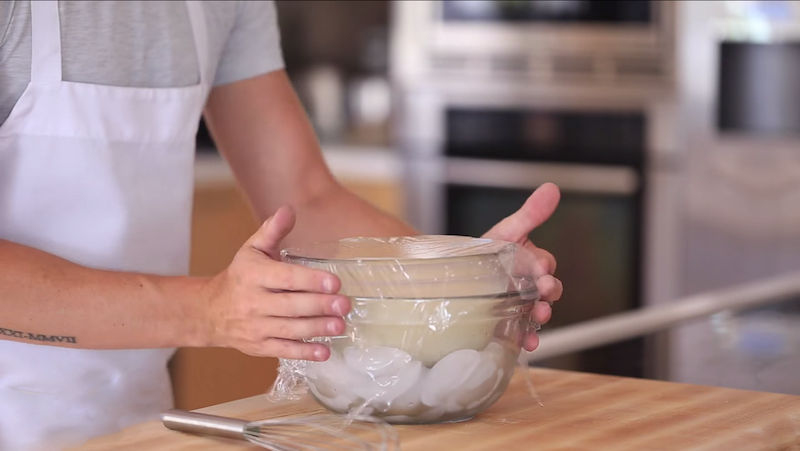
Let them set up in the freezer for about 10 minutes.

Screen Shot 2015-07-01 at 3.34.28 PM

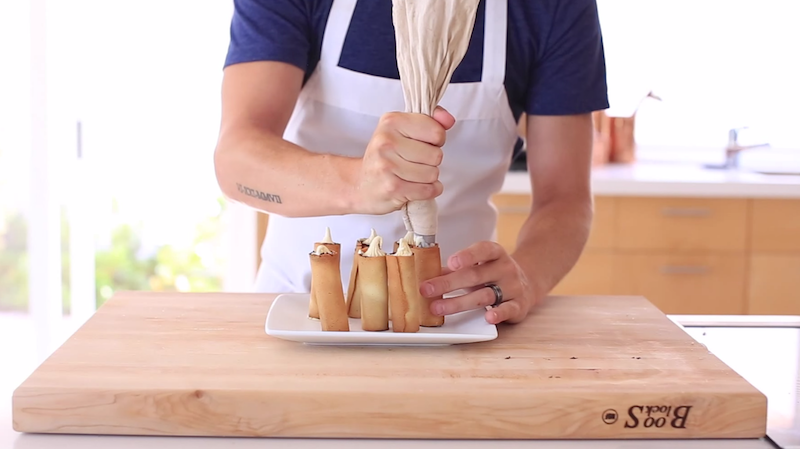
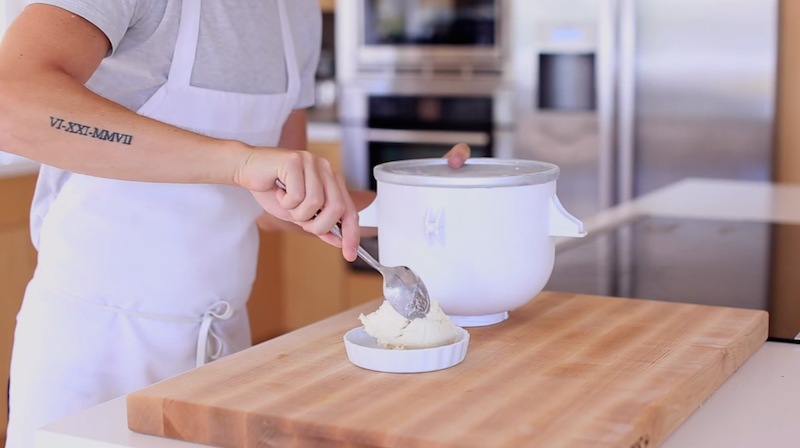
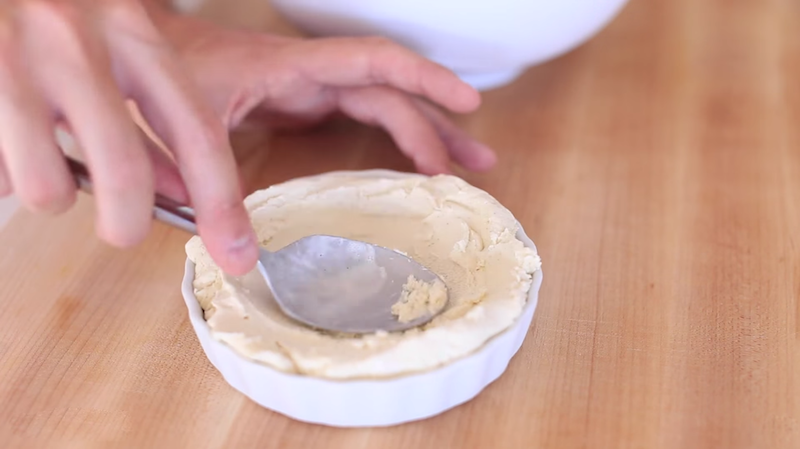
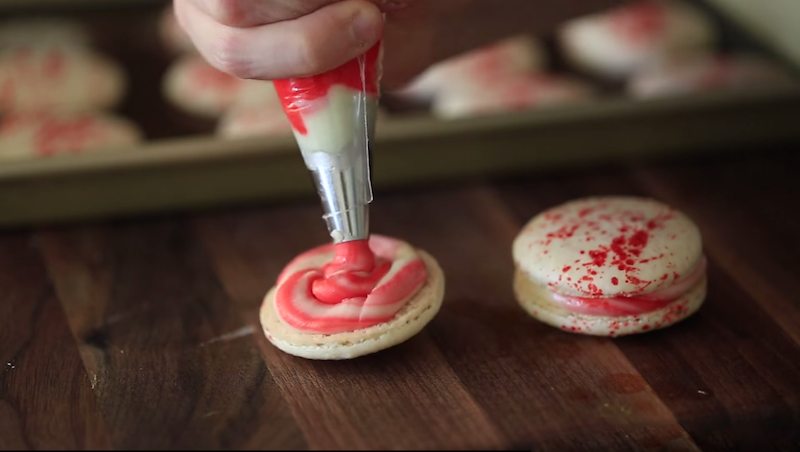
 Once ready, fill each cone with any flavor ice cream you desire! Using a pastry bag is the easiest way to do this.

Screen Shot 2015-07-01 at 3.34.42 PM

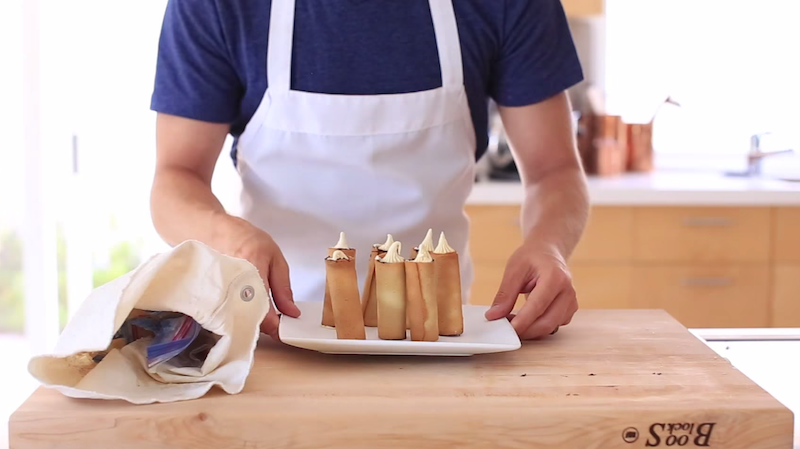
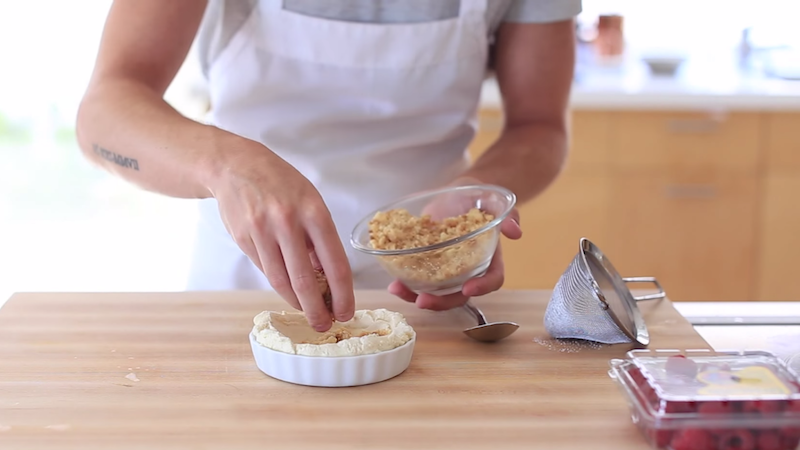
When they are all filled, return them to the freezer for at least 2 hours to set-up…

Screen Shot 2015-07-01 at 3.34.57 PM

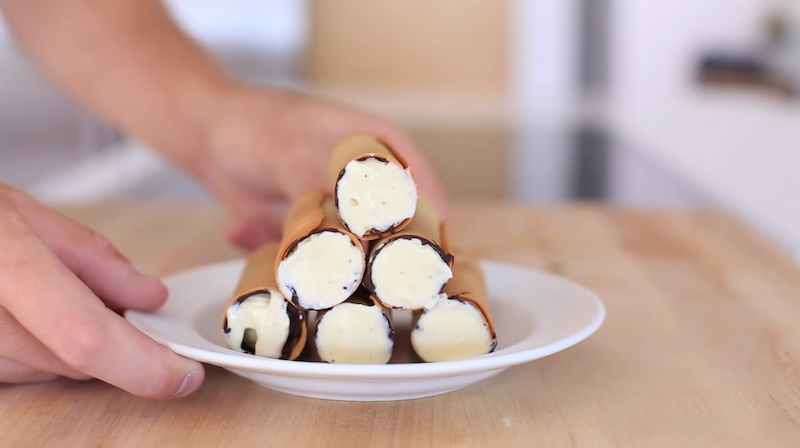
…and then they are ready to enjoy!

Screen Shot 2015-07-01 at 3.35.44 PM

[amd-zlrecipe-recipe:48]

Screen Shot 2015-07-01 at 4.54.20 PM


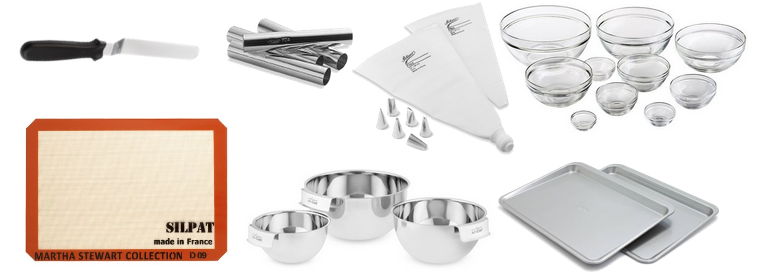
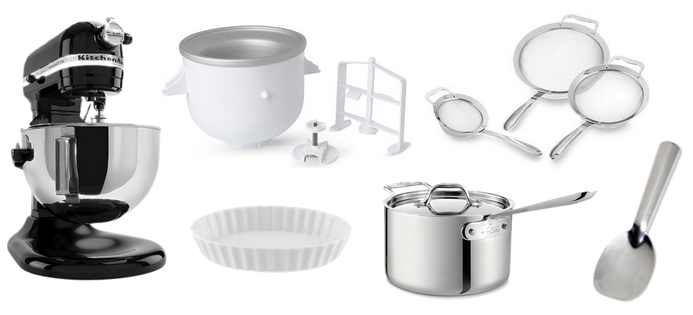
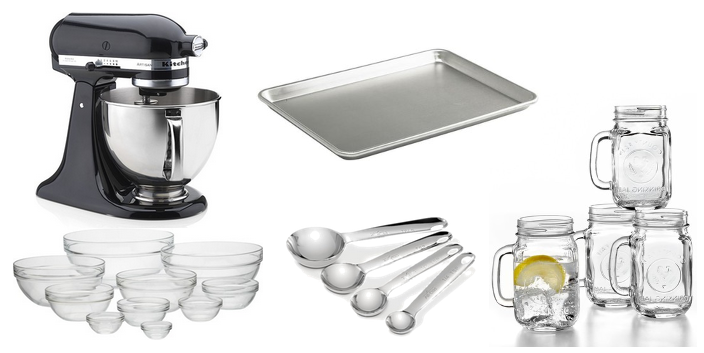
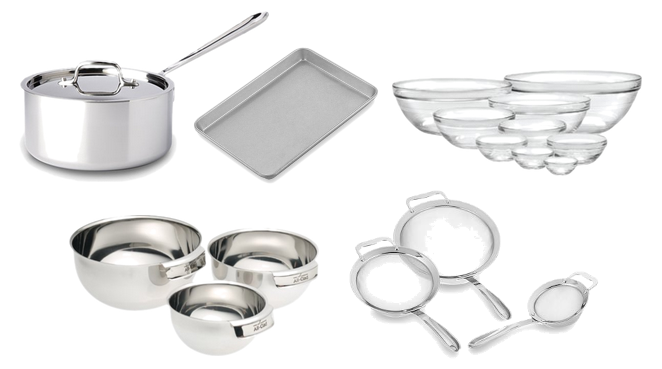
| Top Left: Spatula | Top Middle: Cannoli Form | Top Middle: Pastry Bag | Top Right: Glass Bowl Set |

| Bottom Left: Silpat | Bottom Middle: Mixing Bowls | Bottom Right: Baking Sheet |

Desserts

Raspberry Ice Cream “Tart”

June 17, 2015

Some say “never try to reinvent the wheel,” but when it comes to food, I believe there is always room for re-imagination! Since it’s #IceCreamWeek, I am challenging myself with the task of taking a classic dessert—a raspberry tart—and re-vamping it into a tantalizing ice cream dish that has all the traditional flavors of a tart, but in the form of a rich and creamy ice cream dessert!  Hope you enjoy my twist on a classic!

Screen Shot 2015-06-16 at 7.04.30 PM

Add 4 tbsp of butter to a small sauce pan on medium to high heat.

Screen Shot 2015-06-16 at 7.06.47 PM

Simmer until the butter begins to caramelize and brown.

Screen Shot 2015-06-16 at 7.07.35 PM

Add 1/4 cup of sliced almonds to the pan.  

Screen-Shot-2015-06-16-at-7.08.37-PM

Cook until they begin to brown.

Screen Shot 2015-06-16 at 7.08.54 PM

Once the almonds are toasted, whisk in 2 cups of heavy cream…

Screen Shot 2015-06-16 at 7.09.26 PM

…1 cup of whole milk…

Screen Shot 2015-06-16 at 7.09.38 PM

…1 tbsp vanilla extract…

Screen Shot 2015-06-16 at 7.09.51 PM

…and 1/2 cup sugar.  

Screen Shot 2015-06-16 at 7.10.03 PM

Whisk ingredients until thoroughly combined…

Screen Shot 2015-06-16 at 7.10.48 PM

…and bring to a simmer.

Screen Shot 2015-06-16 at 7.10.29 PM

In a separate bowl add two egg yolks. 

Screen Shot 2015-06-16 at 7.11.06 PM

Temper the egg yolks with the hot cream.

Screen Shot 2015-06-16 at 7.11.48 PM

 Whisking all the while.

Screen Shot 2015-06-16 at 7.12.06 PM

Whisk the tempered eggs back into the sauce pan and bring the cream back to a light simmer, then remove from the heat. 

Screen Shot 2015-06-16 at 7.12.35 PM

Strain ice cream base, removing the almonds.  

Screen Shot 2015-06-16 at 7.12.58 PM

The flavor has already been infused into the cream.

Screen Shot 2015-06-16 at 7.13.25 PM

Give the mixture a good whisk.

Screen Shot 2015-06-16 at 7.14.02 PM

Cool cream to approximately 34-40°F. Cover in plastic and refrigerate to continue cooling.

Screen Shot 2015-06-16 at 7.14.38 PM

Once cooled, add the ice cream base to your handy dandy ice cream machine…

Screen Shot 2015-06-16 at 7.15.20 PM

…and wait for it to do its magic.

Screen Shot 2015-06-16 at 7.15.58 PM

When it’s done, remove excess ice cream from mixer blade…

Screen Shot 2015-06-16 at 7.16.22 PM

…add a sprinkle of salt…

Screen Shot 2015-06-16 at 7.17.01 PM

…give it a good mix, and put it into the freezer to set up. About an hour or 2 should be good.

Screen Shot 2015-06-16 at 7.18.16 PM

Remove from freezer and add 2 scoops to a standard ramekin.  

Screen Shot 2015-06-16 at 7.18.50 PM

Gently press the ice cream into the dish, forming a crust-like shape, and place back in the freezer to solidify for several minutes.

Screen Shot 2015-06-16 at 7.19.26 PM

Once firm, remove ice cream dish from the freezer. Top with 1 cup of pie, tart, or cookie crumbles…

Screen Shot 2015-06-16 at 7.20.09 PM

…fresh raspberries…

Screen Shot 2015-06-16 at 7.21.10 PM

…a sprinkle of powder sugar…

Screen Shot 2015-06-16 at 7.20.55 PM

…and this dish is ready to ENJOY!

[amd-zlrecipe-recipe:45]

Screen Shot 2015-06-17 at 10.42.28 AM

| Left: Kitchen Aid Mixer | Top Middle: Ice Cream Attachment | Top Right: All-Clad Strainer Set |

| Bottom Left: Ramekin | Bottom Middle: All-Clad Sauce Pan | Bottom Right: Ice Cream Scoop |

Desserts

Snickerdoodles

February 9, 2015


How could I not make Snickerdoodles after “The Way the Cookie Crumbles“?

As well as the majorities’ favorite, this is the perfect winter cookie, and couldn’t be easier to make.

Hopefully you enjoy my simple take on the Snickerdoodle.

Screen Shot 2015-01-05 at 9.54.03 AM

In a large mixing bowl, cream together 1/2 cup of brown sugar… 

Screen Shot 2015-01-05 at 9.54.14 AM

…1/4 cup of granulated sugar…

Screen Shot 2015-01-05 at 9.57.29 AM

…and 1/2 cup of unsalted butter for approximately 2-3 minute of mixing on medium speed.

Screen Shot 2015-01-05 at 9.55.00 AM

 Next, add one whole egg to the same large bowl along…

Screen Shot 2015-01-05 at 9.55.45 AM

…with 1tbsp of vanilla paste. Mix for 2-3 minutes until thoroughly combined. 

Screen Shot 2015-01-05 at 9.56.40 AM

Scrape the sides of the bowl down and add 1 tsp baking powder…

Screen Shot 2015-01-05 at 9.56.52 AM

…2 tsp cream of tartar…

Screen Shot 2015-01-05 at 9.57.12 AM

…and 1 1/2 cups of all purpose flour.

Screen Shot 2015-01-05 at 9.57.50 AM

Mix on low-medium speed for 3-4 minutes until the dough is slightly tacky. 

Screen Shot 2015-01-05 at 10.00.19 AM

 Start rolling the dough into little balls.

Screen Shot 2015-01-05 at 10.33.13 AM

Then coat the dough with 1/2 cup of granulated sugar and 3 tbsp of cinnamon.

Screen Shot 2015-01-05 at 10.33.33 AM

Place the coated dough balls onto a baking tray lined with parchment paper.

Screen Shot 2015-01-05 at 10.33.50 AM

Bake at 350f for 10-15 minutes.

Screen Shot 2015-01-05 at 10.34.52 AM

Just keep in mind that the longer you bake the Snickerdoodles the more crispy/crunchy they’ll become.  

Screen Shot 2015-01-05 at 10.34.21 AM

Once they’re done baking, pull them out of the oven to cool off for 10 minutes and then it’s time to enjoy!!

Screen Shot 2015-01-05 at 10.38.34 AM

Milk please! 

[amd-zlrecipe-recipe:28]

Screen Shot 2015-01-05 at 11.20.21 AM

| Top Left: Kitchen Aid Mixer | Top Middle: Baking Sheet |
| Bottom Left Right:Glass Bowl Set | Bottom Left: All-Clad Measuring Spoons | Bottom Middle: Mason Jar Glasses |

Desserts

“Candy Cane” Macaron

December 6, 2014

I’ve made tons of Macarons in the past; I even had a #MacaronWeek, but to date this has certainly been my most creative twist on this classic cookie.

The result couldn’t have been more festive and tasteful!  This is definitely a recipe you’ll give yourself a nice pat on the back after achieving.

Hope you enjoy my “Candy Cane” Macarons.

Screen Shot 2014-12-05 at 3.23.15 PM

In a medium sized mixing bowl add 1 medium egg white and begin to whisk until slightly frothy.

Screen Shot 2014-12-05 at 3.23.55 PM

Add 20g of granulated sugar and continue to whisk for 5-7 minutes until they it forms soft peaks.

Screen Shot 2014-12-05 at 3.24.33 PM

In a separate large mixing bowl sift together 65g of powdered sugar…

Screen Shot 2014-12-05 at 3.24.45 PM

Screen Shot 2014-12-05 at 3.24.55 PM

…and 55g of almond meal.

Screen Shot 2014-12-05 at 7.11.23 PM

Next, fold a third of the meringue into the sifted sugar and almond meal and continue this process until the batter resembles flowing lava.

Screen Shot 2014-12-05 at 3.27.16 PM

Transfer the batter to a piping bag thats fitted with a medium round metal pastry tip.

Screen Shot 2014-12-05 at 3.27.43 PM

Begin piping quarter sized circles  onto a baking tray that’s lined with parchment or a mat, leaving about an inch space in between each circle.

Screen Shot 2014-12-05 at 3.29.34 PM

Give the tray a few taps on the counter to even out the circles and allow to dry for 20 minutes.

Screen Shot 2014-12-05 at 3.30.05 PM

Once dry, sprinkle or flick a little red dye mix with water right on top of the dried macarons.

Screen Shot 2014-12-05 at 3.30.26 PM

Then bake in a 325f oven for 15 minutes.

Screen Shot 2014-12-05 at 3.31.10 PM

For the ganache, bring 1/4 cup of heavy cream…

Screen Shot 2014-12-05 at 3.31.21 PM

…and 1 tbsp of peppermint extract to a simmer.

Screen Shot 2014-12-05 at 3.30.54 PM

Add 1 cup of chopped white chocolate to a metal a mixing bowl.

Screen Shot 2014-12-05 at 3.32.15 PM

Slowly pour the hot cream mixture over the center of the chopped chocolate and begin string until well combined.

Screen Shot 2014-12-05 at 3.33.58 PM

Transfer half of the ganache to a piping bag fitted with a metal round tip.

Screen Shot 2014-12-05 at 3.34.35 PM

Then mix 1 tsp of red dye with the other half of the ganache.

Screen Shot 2014-12-05 at 3.34.55 PM

Transfer it to the other side of the same piping bag. Let this rest for 20 minutes before use.

Screen Shot 2014-12-05 at 3.35.44 PM

Take the macarons out of the oven and allow to cool for 30 minutes before filling, but once they’ve cooled down pipe a 1-2 tbsp of filling into the center of the macaron.

Screen Shot 2014-12-05 at 3.36.18 PM

Sandwich it between another cookie.

Screen Shot 2014-12-05 at 3.22.17 PM

Eat them right away or allow to mature for 24 hrs. ENJOY!

[amd-zlrecipe-recipe:9]

Screen Shot 2014-12-12 at 12.54.48 PM

| Top Left: All-Clad Sauce Pan | Top Middle: Baking Sheet | Top Right:Glass Bowl Set |
| Bottom Left: All-Clad Bowl Set | Bottom Middle:All-Clad Strainer |