Search results for

chocolate cream filled

Breakfast, Desserts

Chocolate Cream Filled Donut

August 23, 2014

Epically decadent, this donut is probably the most delicious donut you will ever eat!  I dare you to eat just one. Can’t be done!

Adding yeast.

To kick this off start by adding warmed milk to an electric mixer along with granulated sugar and dry active yeast.

Bubbles Forming on Surface

Let this mixture sit until you can clearly make out a layer of bubbles or foam on the surface.

Adding egg to mixture

Add the melted butter and egg to the bubbling yeast mixture and stir for a minute or so.

Adding Flour

With your mixture on low speed, slowly add the flour a ¼ cup at a time. Don’t forget to take breaks from mixing to scrape down the sides of the bowl. Continue mixing until the dough has formed into a silky smooth ball.

Rolling Out Dough

 Roll out the dough on a floured surface and occasionally flour the top of the dough so it doesn’t stick to the rolling pin.

Punch out dough

Now it’s time to form your donut! Punch the dough out with a large ring cutter.

Cover dough

Place the perfectly formed dough under a damp cloth and allow them to double in size.

Mixing Custard

While you wait on the dough you can make the delicious chocolate cream filling by adding the milk, egg yolks, vanilla extract, and sugar to a saucepan on low heat and stirring consistently. Once it’s reached 160°F add the cornstarch and increase the heat to a low-medium to begin thickening the custard.

Adding Chocolate Chips

As soon as it has thickened you can add the chocolate chips to the mixture.

Put custard in bag

Once all the chocolate is melted, and mixed into the custard, turn the heat off and scoop the custard into a piping bag to refrigerate.

Vanilla Frosting Mix

If chocolate cream filling wasn’t quite enough, we’ll top this guy off with a homemade vanilla glaze using a mixture of milk, vanilla extract, and powdered sugar.

Frying Donut

 Begin frying the double-sized dough, flipping them at least 2-3 times during the cooking process to insure an evenly cooked donut.

Donuts on rack

Once they’re golden brown, remove them from the oil and rest on a few dry paper towels or a wire rack to get rid of any excess grease.

Piping Donuts

Pull the chocolate cream filling out of the fridge and begin to pipe it into the center of each donut. You’ll have to get a little rough with the donut in order to really fill them up, so don’t be to shy when digging the tip of the pastry bag into the middle of the fried dough.

Applying Frosting

Next, dip the tops of the custard filled donuts in the vanilla glaze and give them a minute to set.

Chocolate Cream Filled Donut

When the frosting is set, dig in and ENJOY this decadent treat!!!

[amd-zlrecipe-recipe:22]

Tools Used

| Top Left: KitchenAid Mixer | Top Middle: All-Clad Sauce Pan | Top Right: Piping Bag and Tip Set | Bottom Left: Whisk |
| Bottom Middle: Mixing Bowls | Bottom Right: Wooden Rolling Pin |


Desserts

Cannoli Bites (Matcha, Dark Chocolate, Vanilla)

October 23, 2017

Cannoli’s are yet another beautiful example of what flour, butter, and booze will do for ya! In all seriousness though, this recipe is a cinch to make, but I would caution the hot oil part…frying is always a risk we cooks take, so just be careful. The reward is a wonderful though. Anyways, try this out and you won’t be disappointed. Let me know what filling you end up going with!!!

In a small food processor add 1 cup of all-purpose flour…

…1/4 cup of sugar…

…1/4 cup of butter…

…and 1 tsp of salt.

Blend until it reaches a mealy texture.

Then add in 2 egg yolks…

…3 tbsp of brandy (or dark rum)…

…and 4 tbsp of water.

Blend until the texture of the dough is slightly tacky.

Remove the dough from the food processor.

Knead it for 2-3 minutes, or until it begins to stiffen.

Wrap in plastic and let chill for 15 minutes.

Once chilled, remove from the fridge and roll it out into 1/4” thick sheets.

Half the dough so that it will fit inside of the pasta maker.

Starting on a thicker setting, begin running the dough through the pasta maker until it has reached the thickness of a credit card.

Divide the dough into manageable sheets and trim it down to 1 1/2” strips. 

Using a cannoli mold, roll the dough all the way around (slightly overlapping the other side)…

…trim the excess…

…and seal with a little water on the edge of your finger.

Using canola oil, carefully fry cannoli shells for 2-3 minutes, or until they are golden brown on all sides.

Repeat the process until the dough has all been used.

These can be filled with just about anything! I decided to whip up 1 cup of cream with 1/2 cup of sugar until it had stiff peaks. Divided that into thirds added 4 tbsp of matcha powder to one…

…2 tbsp of cocoa powder to another…

…and 2 tbsp of vanilla paste to the last…fold…pastry bag…done!

Pipe the filling into the cannoli shells and ENJOY!

[amd-zlrecipe-recipe:126]

| Top Left: Boos Cutting Board | Top Middle: Food Chopper | Top Right: Piping Bag Set |
| Bottom Left: Glass Bowl Set | Bottom Middle: Pasta Machine | Bottom Right: Cannoli Molds |

Food for Thought

The Chocolate & Caramel Connection

February 1, 2016

Chocolate and caramel make a sultry and satiating duo that can’t be matched! Drizzled over a sundae, wrapped in a candy bar, or baked in a molten lava cake…anything chocolate and caramel goes! #ChocolateCaramelWeek anyone?

In the mean time, here are a few chocolate and caramel concoctions that are worth day dreaming about!


The Salted Caramel Hot Chocolate

salted-caramel-hot-chocolate-web

Salted Caramel Hot Chocolate should be a no brainer! As Joey would say, “Sugar…Good. Salt…GOOD. Chocolate…GOOOOD!”  And this killer concoction takes drinking chocolate to the next level!  Whether you’re making it at home or grabbing it from Starbucks, it’s a mouthwatering MUST-TRY!


The Chocolate Caramel Brownie Cup

brownie-cooked1-624x415

 Picture a molten lava cake, made from brownie batter, half baked, and filled with ooey and gooey warm caramel! There in, you have the Chocolate Brownie Cup!Need I say more? I’m not sure life would be the same after this one…but I’m willing to risk it!


Chocolate and Caramel Macarons

maxresdefault

These I know for a fact are life changing! My slight obsession with Macarons (and by slight I mean I could eat these everyday-all-day) lead me to concocting these Caramel Filled Chocolate Macarons! I whipped these up with a buddy of mine that was new to baking to prove that homemade macarons are completely doable! If you haven’t tried making them yet, this is the recipe to start with and I guarantee you’ll be hooked!


Brownie Cookies with Salted Caramel Creme Filling

Brownie-Sandwich-Cookies-with-Salted-Creme-Filling-2_Bakers-Royale1

Salted caramel creme—SAY WHAY? Rich caramel whipped into a thick creme and sandwiched between two soft brownies! I don’t think life gets better than these Salted Caramel Brownie Bites, but I’m still willing to search around! Nomming in the name of research, right?! 


Salted Chocolate Caramel Chips

Screen Shot 2016-02-01 at 12.06.46 PM

If you want to take it back to basics, these Salted Chocolate Caramel Chips were one of the first caramel and chocolate creations on my channel and I’m still dreaming about them! Simple to make and absolutely killer! Perfect balance of salty, sweet, and bitter (dark chocolate).


Chocolate Caramel Tart

7-choco-caramel-tart-post-400

Remember this guy from my “Outragious Chocolate Treats” post? Like I said, this Chocolate Caramel Tart isn’t crazy in execution…it’s crazy because of just how good it sounds! A homemade chocolate tart, filled with a creamy caramel filling made with creme fraiche, topped with a rich chocolate ganache and a sprinkle of sea salt! A sophisticated take on a classic chocolate candy bar and gluttony at its finest! 


Chocolate Ball & Hot Caramel

Screen-Shot-2015-03-04-at-12.46.17-PM

And if a show is what you’re after, the Chocolate Ball is guaranteed to garner some “ooohs and awes!” Hot caramel poured over a dark chocolate sphere that slowly melts into a pool of warm liquid goodness—all around a scoop of vanilla bean ice cream topped with fresh nuts and berries! A new age sundae that will not be out down!


Rolo Brownie Trifle

Rolo-Brownie-Trifles

The king of chocolate caramel creations, and movie theater nostalgia, would have to be the ROLO! Chewy caramel covered in sweet milk chocolate equals DREAMY! Now imagine someone took the candy we know and love, mashed it into brownie batter, baked that, and them alternated layers of the baked rolo brownie with layers of homemade vanilla bean whipped cream and hot caramel…you’d get the Rolo Brownie Trifle!

MIND BLOWN.


Salted Caramel and Chocolate Popcorn

popcorn_5wp

If you’re looking for something a little lighter, there are definitely a few other options that’ll hit the spot! This Salted Caramel and Chocolate Popcorn is made by popping a few kernels, tossing them in some homemade salted caramel, and throwing in a few (or more) dark chocolate chips. Simple, unique, to die for!


Caramel Coated Chocolate and Toffee Apples

Screen Shot 2016-02-01 at 12.04.51 PM

And finishing off these killer chocolate and caramel must-tries with a classic—I present to you the Caramel Coated Chocolate and Toffee Apples! A carnival favorite and mine as well! Fresh honeycrisp apples coated in a thick homemade caramel and then rolled in butter toffee and dark chocolate chips! Is this what heaven’s like?

Food for Thought

The Most Popular Chocolate Pairings

January 22, 2016

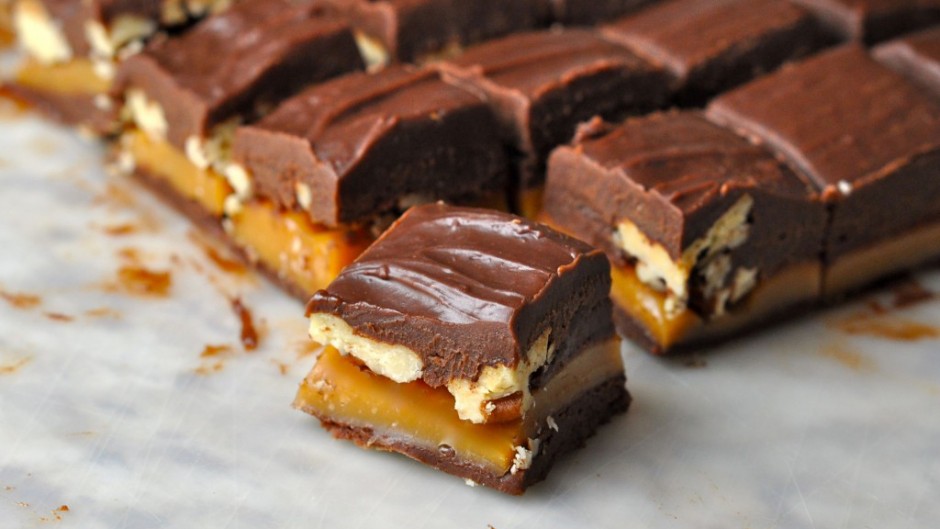
It’s no secret that chocolate pairs well with a slew tasty treats, but if you want to learn how to pair like a pro, you need to know the basics of what types of chocolate go best with what types of noms, and why!


Fruits

Photo Credit: chloesgourmettopping.com

We all know that chocolate covered strawberries are the JAM, but did you know that chocolate dipped pears and mangos can be just as sensational? The secret is knowing how to pair which fruits with which chocolates—and in this case opposites attract!

The darker the chocolate, the more bitter. The more bitter, the more it’s needs to be complimented by something very sweet.  That’s why dark chocolate goes great with ripe strawberries, pears, mangos, bananas…the sweeter the better! White chocolate on the other hand is already very rich and sweet.  Pairing white chocolate with fruits that have a higher acidity or more mild flavor, such as tart berries and citrus, or mild melons and passion fruit, compliment this type of chocolate VERY well! If ever in doubt, milk chocolate is the best middle ground.


Nuts

cbcd250692e700c46ef896486208a621

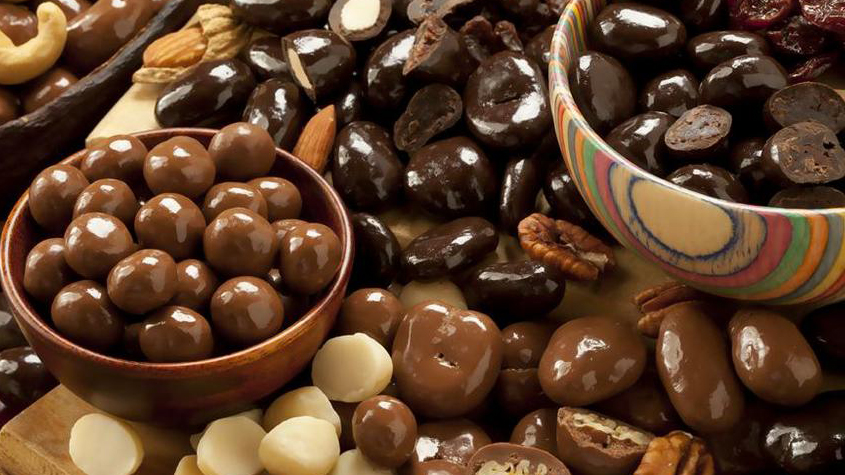
Photo Credit: goosagourmet.com

I love nuts, I love chocolate, and frankly I love them both together! Though, it can be said that chocolate enhances the flavor of some nuts better than others. Peanuts, almonds, hazelnuts, and pecans have very distinct flavor components that go great with dark chocolate! They may be a little overpowering for some milk and most definitely white chocolates. Walnuts tend to be a bit more mild than it’s counterpart the pecan and goes great with milk chocolate! Macadamias are ideal when working with white chocolate because they are very mild and compliment the richness of white chocolate.  It’s all about that balance!


Cheeses

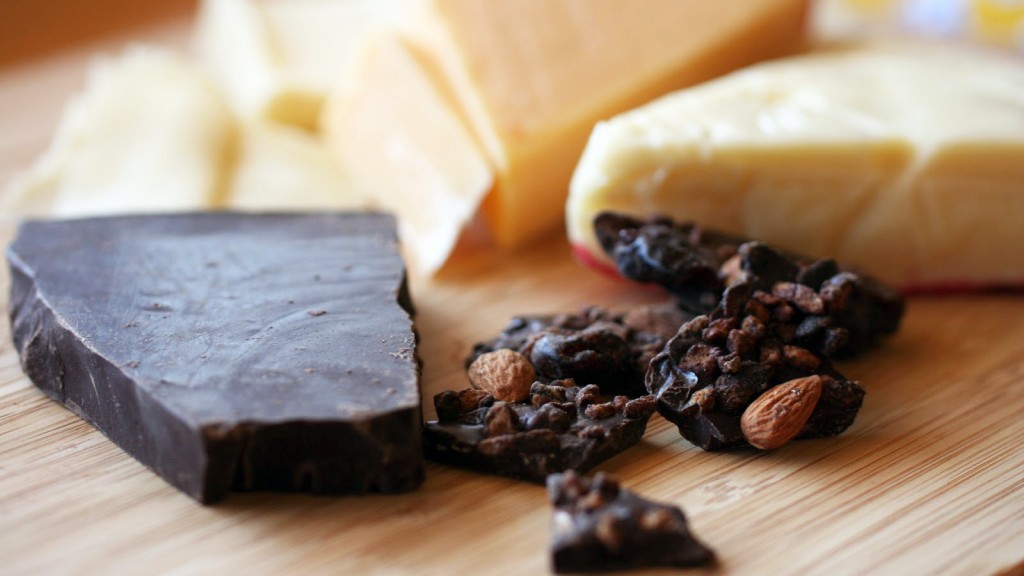
Photo Credit: thewifeofadairyman.blogspot.com

Rich, buttery, nutty, creamy–terms you can use interchangeably when talking about cheese and chocolate! It doesn’t initially seem like an obvious match, but certain cheeses and chocolates have flavor components that complement each other VERY well!

In general, lighter and creamier cheeses pair better with lighter, and consequently, creamier chocolates. Pairing milk chocolate with a side of Gruyère (known for its nutty flavor) will emphasize the sweetness of the chocolate and the nuttiness of the cheese without overpowering either of the flavor components. A cheese that is more acidic and pungent, like a blue cheese or a goat cheese, would go better with a darker chocolate that can stand its own amongst those intense flavors.
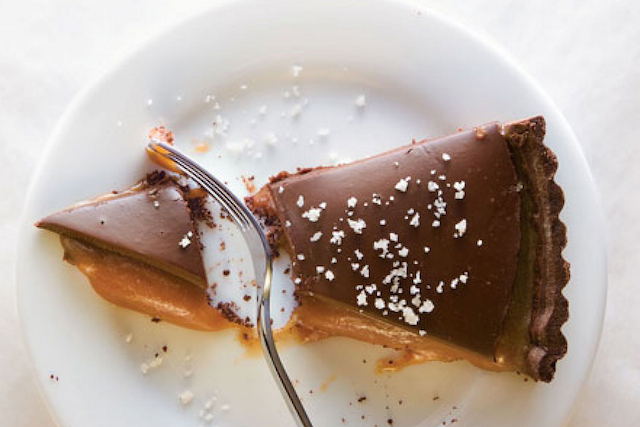

Sweet Fillings

ChocolateCaramelPecanCubes1-1024x654

Photo Credit: moresweetsplease.com

When it comes to sweeter chocolate add-ins, like honey and caramel, I prefer a darker chocolate base.  Yes it’s true, milk chocolate and caramel taste great together, but it’s also true that they make one rich combo! A piece or two and you’re sugared out…where as a dark chocolate filled with caramel creates a perfect balance of sweet and bitter, without being overwhelming.


Peanut Butter

Chocolate-Peanut-Butter-Bars-Bite

Photo Credit: http://www.thewannabechef.net

In the case of peanut butter and chocolate, the flavor and texture of roasted nuts are very similar to those of cocoa beans and mix well together—as evident by the plethora of popular chocolate and peanut butter concoctions! 

When the oils of peanut butter combine with the cocoa butter of chocolate, the melting point of the chocolate decreases. This allows for it to melt in your mouth more rapidly and release a burst of chocolatey-peanut-butter flavors as soon as it hits your tongue! I would recommend that if you make a peanut butter and chocolate dish at home, always use an unsweetened peanut butter if you’re working with milk chocolate and a sweetened peanut butter with dark chocolate.  Balancing the sweetness is key!
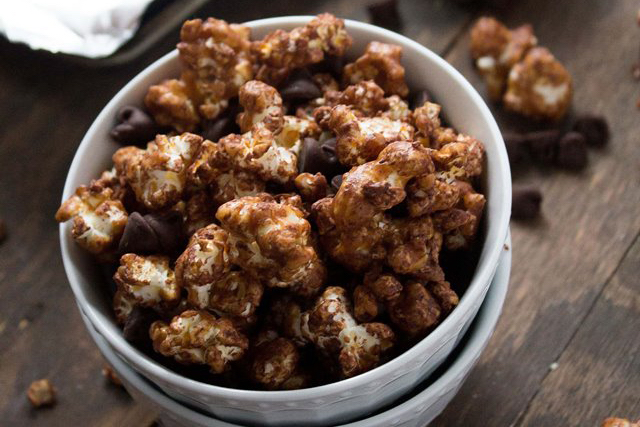

Salty Treats

img_0332-2

Photo Credit: foodbabbles.com

Not the most obvious choices for pairing with chocolate…but bacon, potato chips, pretzels, and generally most salted treats go great with chocolate, and I believe I know WHY!

Sugar represents energy. Our bodies need energy, hence when we consume sugar positive receptors go off, giving ourselves a hypothetical “pat on the back.” The same goes with salt.  Unlike other nutrients we have no way of storing salt for future use, but we need it to survive. Therefor we constantly crave salt. With this in mind, providing our bodies with salty treats (bacon, chips, pretzels) and then coating those treats in sugar (chocolate), creates a DOUBLE WHAMMY of positive reception! Hence, why we love it!


Coffee

large_aloha-jeannine-coffee-milkshake-hero

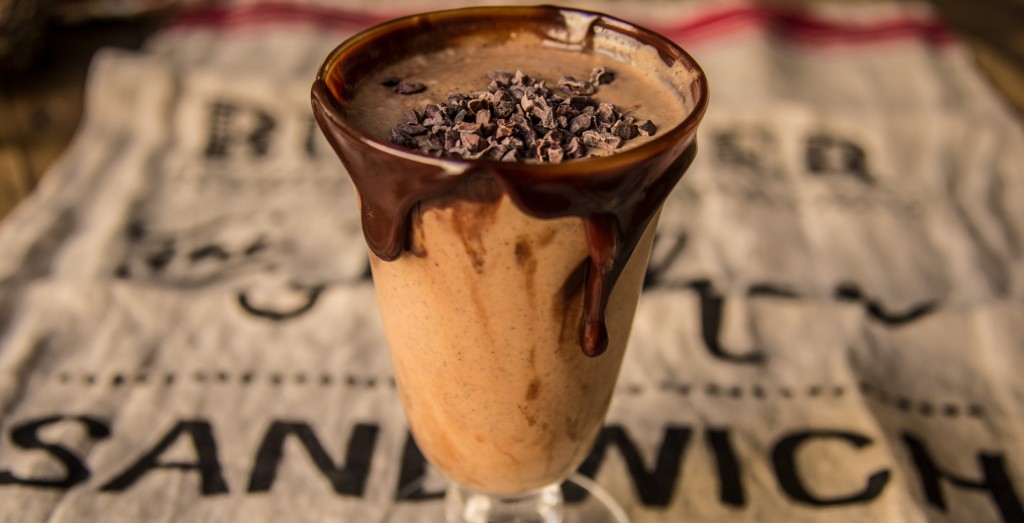
Photo Credit: aloha.com/

A more obvious pairing of chocolate would be with coffee! Both nutty and bold flavors go phenomenally well together; especially when paired correctly! Darker chocolates goes with darker and bolder roasts, like a Sumatra or Italian roast. Anything that won’t be overpowered by either of the bold components. Milk chocolate goes best with a medium roast, like Colombian, Kenyan, or Kona coffee. A breakfast blend is sensational with a few pieces of creamy milk chocolate! Lighter roasts, like Costa Rican and Yemeni coffees, pair well with the lightest of “chocolates”—white chocolate!


Wine

Wine-choco

Photo Credit: exoticchocolatetasting.com/

Now everybody loves the idea of pairing chocolate and wine! It’s so romantic, right? But truth be told, the actual task can be a bit more daunting than expected—and with good reason. Chocolate and wine both have very intense flavors! A bite of good chocolate can easily overpower the taste of a light red or white wine—as does a sip of good dry wine to less bold chocolates…

The key to successfully pairing wine with chocolate is to match sweetness with sweetness! A little counter intuitive compared to pairing chocolate with just about any else, but it’s the only way to do it! Pairing milk chocolate (or sweeter dark chocolates) with dessert wines, like a Vintage Port, Madeira, or a sweet sherry, is the easiest way to make a successful pairing. These types of wine bring a natural sweetness to help keep up with the sweetness of the chocolate. And when paired right…chocolate and wine can be extraordinary!


All that said…what’s your favorite, and MOST unusual, chocolate pairing?
Can’t wait to see what you come up with!

Main Course

My Chocolate

January 11, 2016

Here are a few delicious recipes from#ChocolateWeek’s past! What would you like to see from me this time around?


Chocoba

 The Chocolate Ball:

Chocolate Ball:
1 Cup Dark Callebaut
Chocolate Chips

Optional:
Ice cream
Fresh Berries
Walnuts
Topping


  1.  Start off by bringing 1 cup dark callebaut chocolate chips to 101°F, using the double broiling method. Gently mix the chocolate as it slowly melt to ensure all of the solids liquify.
  2. Once the chocolate is throughly melted and up to temperature, remove it from the stove and mix in a few chocolate chips to cool the mixture.
  3. Gently stir in the chocolate chips until the mixture is smooth and approximately 89-90°F.
  4. Once the chocolate is tempered to 89-90°F, pour the liquid into your chocolate mold about a quarter of the way up. Be sure to coat all sections of your mold. Then allow it to cool in the fridge for 30 minutes. Flip every 2-3 minutes to ensure is cools evenly.
  5. Once cooled, remove from the mold.
  6. I like to smooth out the middle seam with a warm spatula, but this is optional. If you prefer a shiny sphere, skip this step.
  7. Next you will want to heat up a plate or pyrex container and gently press the sphere onto the dish, in order to melt the bottom of the chocolate globe. This should leave you with a perfect cavity to fill the sphere with whatever you desire.
  8. Once the sphere is filled to your liking, heat your favorite topping and pour on top of the chocolate sphere. All that is left to do is enjoy!

Irish Whiskey Funnel Cake and Salted Chocolate:Funnel Cake

Salted Chocolate
1/2 cup dark chocolate
1/2 cup heavy cream
1 tbsp butter
2 tbsps irish whiskey
2 tsps sea salt
Funnel Cake Batter
1 cup milk
1 cup all purpose flour
1 whole egg
2 tsps kosher salt
2 tsps baking powder
2 tbsps irish whiskey
1 tsp vanilla extract

  1. Start by melting 1/2 cup of 60% dark chocolate, using the double boiler method, for about 5 mins or until it reaches 120°F.
  2. Next emulsify 1/2 cup of heavy whipping cream and 1 tbsp of cold butter into the heated chocolate, constantly stirring to thoroughly mix these ingredients.
  3. Once the mixture is emulsified add 1 tbsp of Irish Whiskey and 2 tsps of sea salt. Mix well and pour mixture into a squeeze bottle for later use.
  4. In a separate mixing bowl add 1 whole egg, 1 cup of milk, 2 tsps kosher salt, 1 tsp vanilla extract and 2 tbsps of Irish whiskey. Give this a good whisk.
  5. Add 1 cup of all purpose flour and 2 tsps of baking powder. Continue whisking until the batter is completely smooth. Then transfer the batter into a squeeze bottle.
  6. Slowly squeeze the batter into a pan of frying oil (heated to 350°F), making small circular motions. Fry the funnel cake on both sides for about 2-3 mins.
  7. Once the funnel cake is golden brown, transfer it to a paper towel and/or rack to drain any excess oil.
  8. When you are ready to plate simply top the funnel cake with your salted chocolate, add a generous topping of powdered sugar, and there you have it, a delicious Irish Whiskey Funnel Cake with Salted Chocolate. Enjoy!

Waffles

Chocolate Chip Belgium Waffles:

Ingredients:

1 whole egg
1/2 cup whole milk
4 tbps granulated sugar
2 tsps dry active yeast
1 cup all purpose flour
4 tbps melted butter
pinch of salt
1 tbsp vanilla extract (optional)  


  1. In a medium mixing bowl add 1 egg, 1/2 cup of whole milk, 4 tbsp granulated sugar and 2 tsp of dry active yeast. Whisk for 2-3 minutes, until thoroughly combined.
  2. Add a 1/2 cup of flour and mix until the lumps dissipate.
  3. Add another 1/2 cup and continue mixing until there are no remaining lumps.
  4. Mix in 4 tbsp of melted butter.
  5. Once you have a smooth mixture, cover the mixing bowl in plastic wrap and allow the batter to rest for about 1.5 hours.
  6. Once the batter is proofed, add a few handfuls of dark chocolate chips and gently mix.
  7. Add 1 generous scoop of batter to a preheated waffle iron at 450 degrees fahrenheit. Cook for 8 minutes, or until golden brown, flipping the waffle one time in between.
  8. Add some butter, syrup, and all that’s left to do is ENJOY!

Chocolate Cream Filled Donut:Donu

Ingredients:
1/2 cup milk
1 tsp dry active yeast
1/4 cup sugar
2 cups flour
4 tbsp melted butter
1 whole egg
3/4 cup whole milk
2 egg yolks
1/4 cup sugar
1 tbsp vanilla extract
2 tbsp cornstarch
1/4 cup dark chocolate chips
3-4 tbsp whole milk
1 cup powdered sugar
2 tsp vanilla extract or paste 

  1. Warm up the milk in the microwave (or on the stove) to about 95°F then add it to the bowl on an electric mixer along with the granulated sugar and dry active yeast. Let this mixture sit for 20 minutes until it creates a layer of bubbles or foam on the surface.
  2. Add the melted butter and egg to the bubbling yeast mixture and stir for a minute or so. Attach the dough hook to the mixer and turn on low speed. Slowly start to add the flour a 1/4 cup at a time. Once all the flour has been added, scrap down the sides of the bowl then continue mixing until the dough has formed into a silky smooth ball. This will take approximately 5-6 minutes.
  3. Flour the surface of your working surface then take the dough out of the mixture, put into on the floured surface and begin rolling it out. Occasionally flour the top of the dough so it doesn’t stick to the rolling pin. Punch the dough out with a large ring cutter, remove the excess dough, then cover with a damp cloth. Allow the dough to double in size which will take approximately 45 mins to an hour.
  4. In a small sauce pan on low heat add the milk, egg yolks, vanilla extract, and sugar and bring up to 160°F making sure to constantly stir as its heat up. Once the it’s reached 160°F add the cornstarch and turn the heat up to low-medium and begin to cook the custard until it get very thick. It should take about 5-6 minutes. Once it has thickened to a pudding consistency turn the heat off and scoop the custard into a piping bag fitted with a metal tip. Refrigerate for 30-45 minutes.
  5. In a mixing bowl add the milk, vanilla extract, and powdered sugar and whisk until thoroughly combined.
  6. Once the dough has doubled in size and is ready to fry fill a pot half way up with canola oil to 350°F, and begin frying the donuts. They’ll take 4-5 minutes to cook and you should flip them at least 2-3 times during the cooking process to insure an evenly cooked donut. Once they’re golden brown remove them from the oil and rest on a few dry paper towels or a wire rack to get rid of any excess grease. Let them cool down for 5-10 minutes before filling and glazing.
  7. Pull the chocolate cream filling out of the fridge and begin to pipe it into the center of each donut. You’ll have to get a little rough with the donut in order to really fill them up, so don’t be to shy when shoving the tip of the pastry bag into the middle of the fried dough. Next, dip the tops of the warm filled donuts in the vanilla glaze and return them to the wire rack (or paper towels). Let these sit for 10-15 minutes in order for the glaze to set up then ENJOY!!!

Choco Taco

Choco Taco:

Ingredients: 
2 whole eggs
1/2 cup sugar
1/3 cup all purpose flour
3-4 tbsp whole milk
1/4 cup melted butter
1 tbsp vanilla extract
pinch of salt
1 cup melted dark chocolate
1/4 cup chopped roasted peanuts
1 qt of store-bought ice cream 


  1. Add two whole eggs and 1/2 a cup sugar to a medium mixing. Give it a good whisk.
  2. Mix in 3-4 tbsp whole milk, 1 tbsp vanilla extract, 1/4 cup melted butter, 1/3 cup all purpose flour, and pinch of salt.
  3. Continue to whisk for until there are no lumps. Preheat your waffle iron and coat it with a bit of canola oil—so the batter doesn’t stick. Once the waffle iron is hot, pour a small scoop of the batter into the center of the mold (about 4 in. in diameter). Close the machine and cook until the batter is a deep golden brown. While hot, mold the waffle cone into taco form. Repeat process for desired amount of choco waffles (recipe is for 3 servings).
  4. Allow them to cool and become firm before handling. Once cool coat the inside of each shell with a good serving of melted dark chocolate. This will keep the shells from becoming soggy when you fill them with ice cream.
  5. Allow the shells to set up in the freezer for about 10-15 mins.
  6. Once the chocolate is set, pipe a generous portion of your choice of ice cream. I enjoy a rich and creamy vanilla. Use a pastry spatula to gently smooth the excess ice cream evenly across the top of the waffle shells. Put these back into the freezer and allow it to set up for about 2 hours.
  7. When the ice cream is set, remove from freezer and dip the tops of the waffle tacos with the remainder of the melted dark chocolate.
    Sprinkle with chopped peanuts and return to freezer to for about 20 mins.
  8. Once the chocolate has set, dig in!

Enjoy!

Desserts

Ice Cream “Cone” Bites

July 2, 2015

Mixed, baked, chocolate coated, ice cream filled, and ready to eat! I call them, Ice Cream “Cone” Bites, and they’re on a whole other level!

Screen Shot 2015-07-01 at 3.23.22 PM

In a medium mixing bowl, sift 1/2 cup of powder sugar…

Screen Shot 2015-07-01 at 3.24.04 PM

…and 1/2 cup of all-purpose flour.

Screen Shot 2015-07-01 at 3.24.52 PM

 Add 5 tbsp of unsalted butter and blend ingredients for several minutes.

Screen Shot 2015-07-01 at 3.25.22 PM

Whisk in 1 large egg white or 2 medium egg whites…

Screen Shot 2015-07-01 at 3.26.32 PM

….1 tbsp vanilla extract…

Screen Shot 2015-07-01 at 3.26.51 PM

…and a pinch of salt.

Screen Shot 2015-07-01 at 3.26.17 PM

The batter should have a smooth, paste-like texture when ready.

Screen Shot 2015-07-01 at 3.27.39 PM

Use a non-stick sheet pan and a rectangle stencil to begin forming the “cones.”

Screen Shot 2015-07-01 at 3.29.13 PM

Smear a dollop of batter evening across the stencil.

Screen Shot 2015-07-01 at 3.29.57 PM

 Remove stencil and bake for 5-7 minutes at 375°F.

Screen Shot 2015-07-01 at 3.30.31 PM

 Once a nice golden-brown, remove from the oven…

Screen Shot 2015-07-01 at 3.31.06 PM

…and begin rolling the hot pliable cookie around a cylinder form.

Screen Shot 2015-07-01 at 3.32.38 PM

Seal the inside of the cones with a smear of melted dark chocolate.

Screen Shot 2015-07-01 at 3.33.25 PM

Let them set up in the freezer for about 10 minutes.

Screen Shot 2015-07-01 at 3.34.28 PM

 Once ready, fill each cone with any flavor ice cream you desire! Using a pastry bag is the easiest way to do this.

Screen Shot 2015-07-01 at 3.34.42 PM

When they are all filled, return them to the freezer for at least 2 hours to set-up…

Screen Shot 2015-07-01 at 3.34.57 PM

…and then they are ready to enjoy!

Screen Shot 2015-07-01 at 3.35.44 PM

[amd-zlrecipe-recipe:48]

Screen Shot 2015-07-01 at 4.54.20 PM


| Top Left: Spatula | Top Middle: Cannoli Form | Top Middle: Pastry Bag | Top Right: Glass Bowl Set |

| Bottom Left: Silpat | Bottom Middle: Mixing Bowls | Bottom Right: Baking Sheet |